5 Git interactive hands-on workshop
5.1 Session Introduction
In this workshop, delivered within the ‘Introduction to git’ session, you will get hands-on experience using git, applying some of the tools presented in the context of a hypothetical project. You’ll find the setup instructions and materials below.
5.2 Workshop Materials
Please ensure you have completed the following setup steps for participating in this workshop before attempting the tasks described in subsequent sections.
Alternatively, follow the git and GitHub sections of the Technical Setup on the course webpage here
5.3 Software Installation
You will need to install git (and optionally GitHub Desktop, if you do not plan to follow along using the command line):
Main
gitwebsite to download (with guides for Mac, Windows and Linux) and learn more aboutgit:https://git-scm.comGitHub Desktop App: https://desktop.github.com/
5.4 Git Configuration
On first-time use, name and email address are required to configure git. This differs by whether you are using command line or GitHub Desktop
GitHub Desktop: You will be prompted to configure
gitwhen first opening the application.Command Line: You will need to type the following into the console (updating to your login details):
git config --global user.name "<username>"
git config --global user.email xxx@example.com
5.5 GitHub Account
To participate in the workshop you will require a GitHub account. If you have an existing GitHub account, you can use this.
Otherwise, please create one following the steps below.
- Visit GitHub.
- Click the “Sign up” button.
- Provide an email address and password.
Note: More generally, we recommend that you setup two-factor authentication to secure your account.
(This is not essential for the workshop).
5.6 Files
- Please download the following file:
5.7 Helpful resources
The following resources, from the ‘Introduction to Git’ session, may be helpful for completing the tasks below:
5.8 Exercise 1: Introduction to Git/GitHub
5.8.1 Creating a repository
You have recently joined a team where your manager has asked you to use Git for at the start of a new project, investigating the effectiveness of proton pump inhibitors (PPIs).
You will first have to create a repository for this project and then clone this repository to your local computer.
Navigate to GitHub.com and login to your account.
Find and click the ‘New’ repository button (shown to the right)
Provide a repository name and description
- E.g ‘ppi-project’ and ’Repository for project investigating the effectiveness of proton pump inhibitors.
- Tick the box ‘Public’ under repository visibility options
- Note: this can be changed later and some projects, in practice, may start ‘Private’ and then become ‘Public’ at the point of pre-printing/publication.
Tick the box ‘Add a README file’
Under .gitignore, select ‘R’ from the dropdown menu.
- Note: you might initially select .gitignore based on the language you anticipate coding the most in and update, as necessary, if other languages are also used.
Under license, select ‘MIT’ from the dropdown menu.
Click ‘Create repository’
5.8.2 Cloning a repository
Having created the repository, let’s now clone this repository to our local computer.
- On GitHub.com, navigate to the main page of the repository
- Note: if following directly from the previous step - this will be the current page.
- Above the list of files, click ‘Code’ and a drop-down menu should appear (see below)
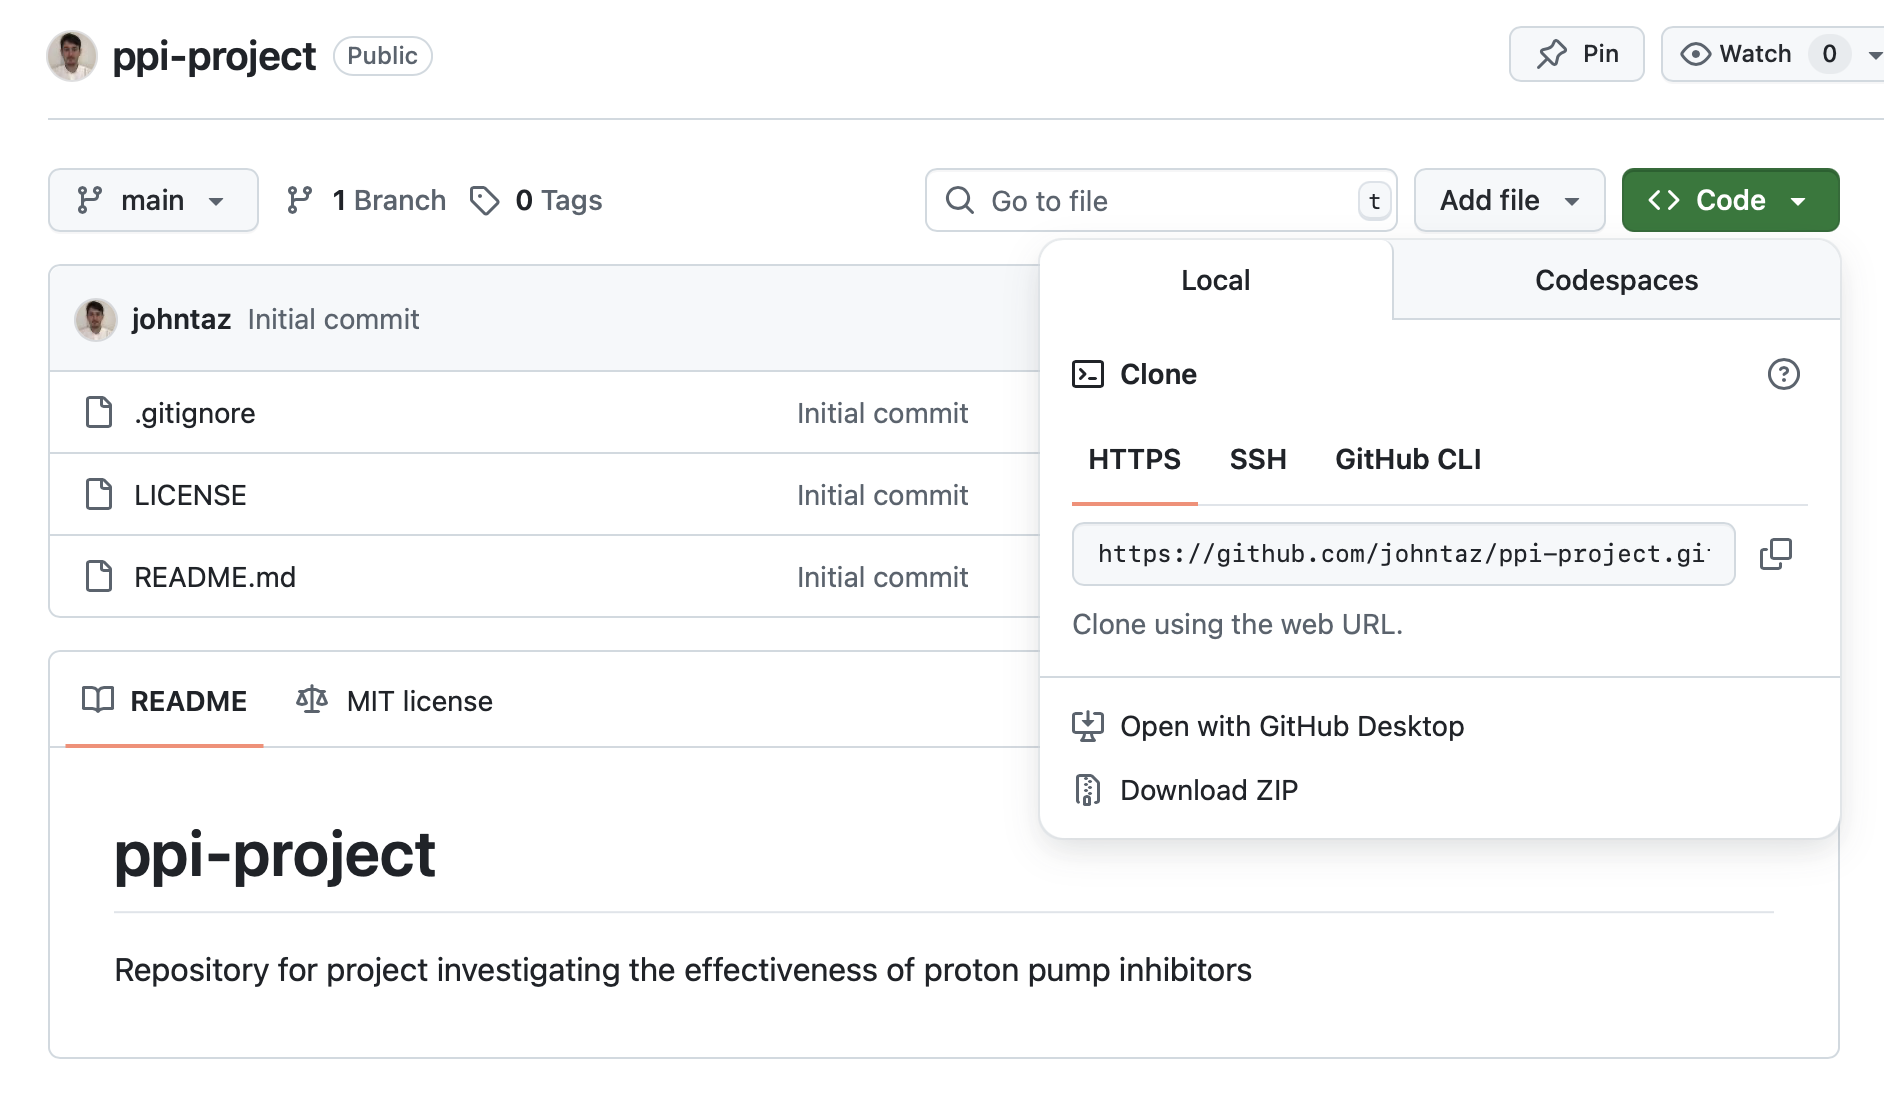
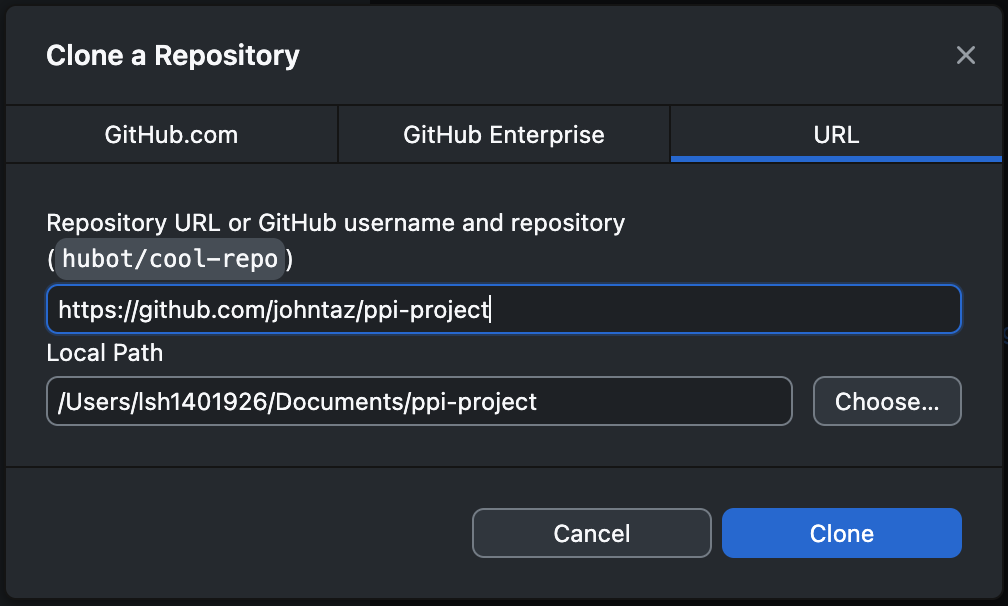
Click ‘Open with GitHub Desktop’ and the prompt below should appear.
Check the repository URL refers to https://github.com/YOUR-USERNAME/YOUR-REPOSITORY and specify your own local path (the folder where the repository will be cloned to). Click ‘Clone’.
5.9 Exercise 2: Basic Git workflow
5.9.1 Initial stage and .gitignore
Your manager sends you some files that a previous analyst developed for a similar project and asks you to add these flies to your repository.
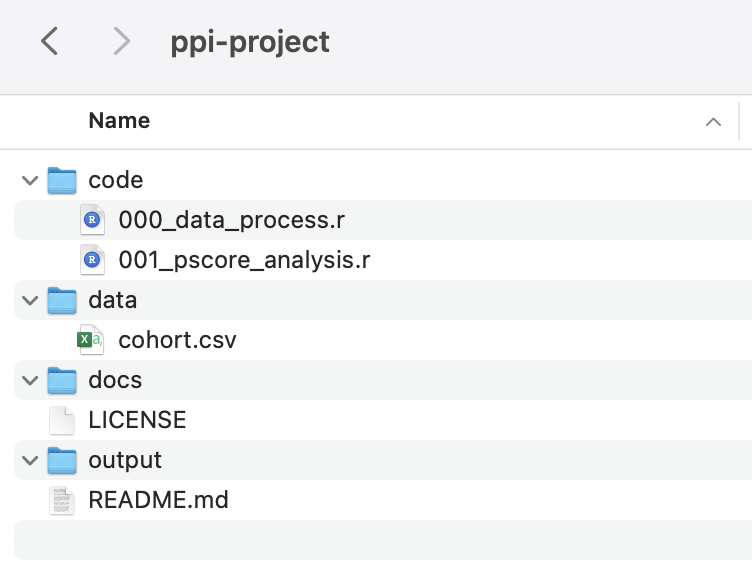
Navigate to the location where you downloaded the ‘Project’ folder and unzip these files - you should see 4 folders named “code”, “data”, “docs”, “output”.
Copy or Move these folders to the location where you cloned the repository - your local repository folder should look as below.
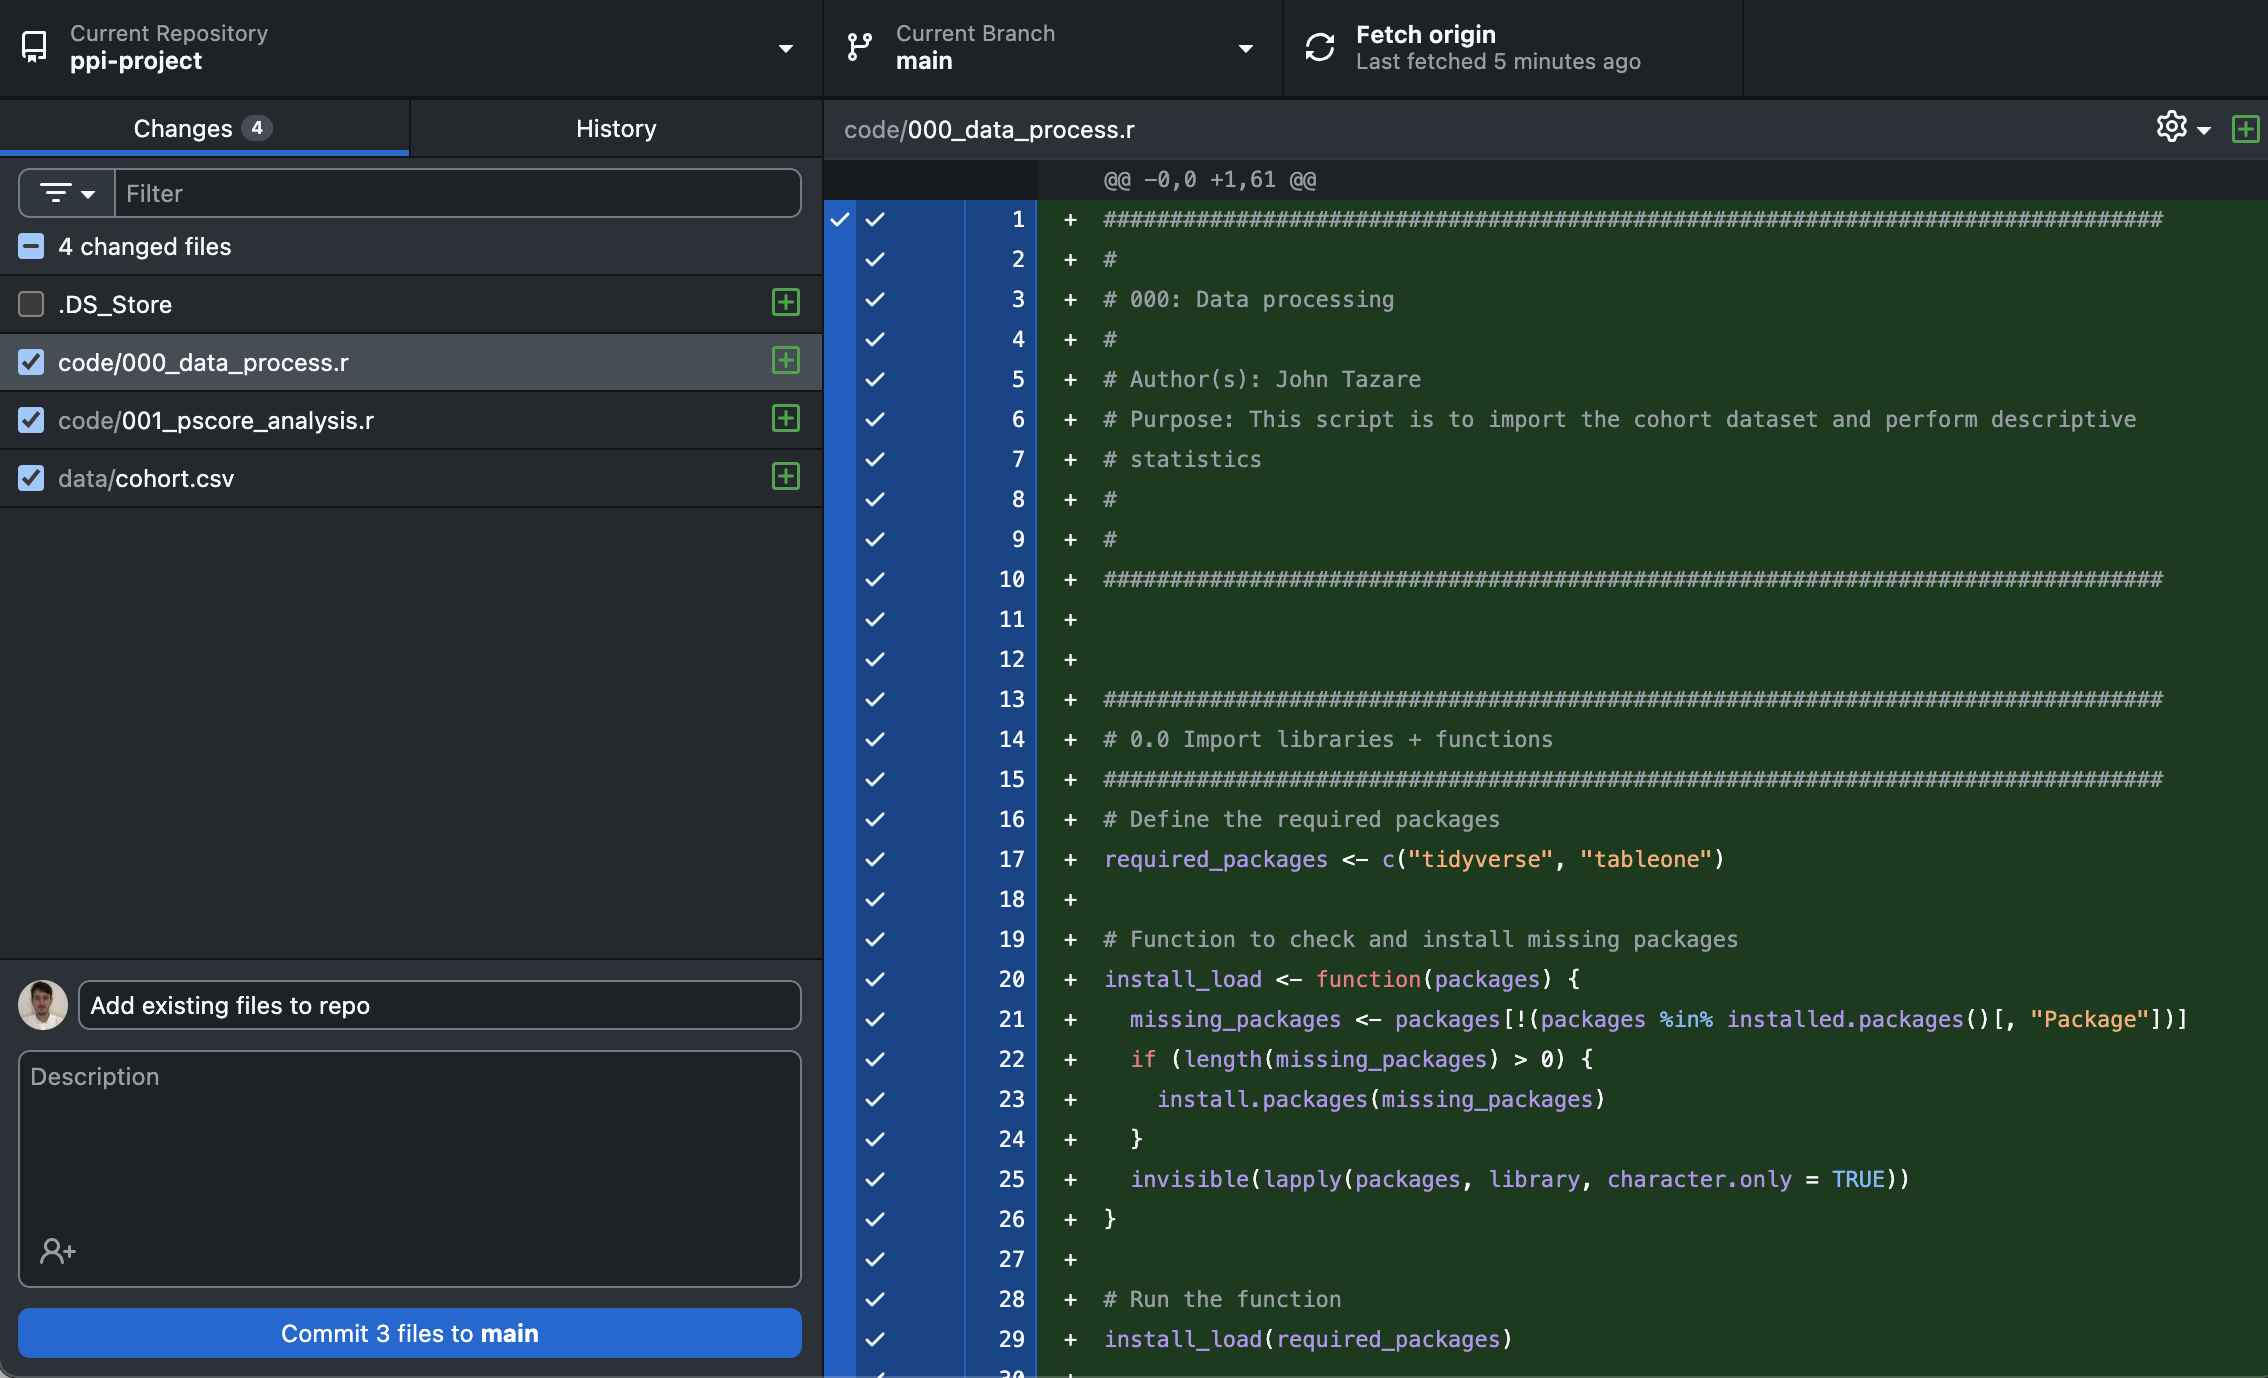
- Return to GitHub Desktop. You should now see the code files in the ‘Change Files’ window. Make sure these are ticked, the ‘ticking’ indicates the files are staged.
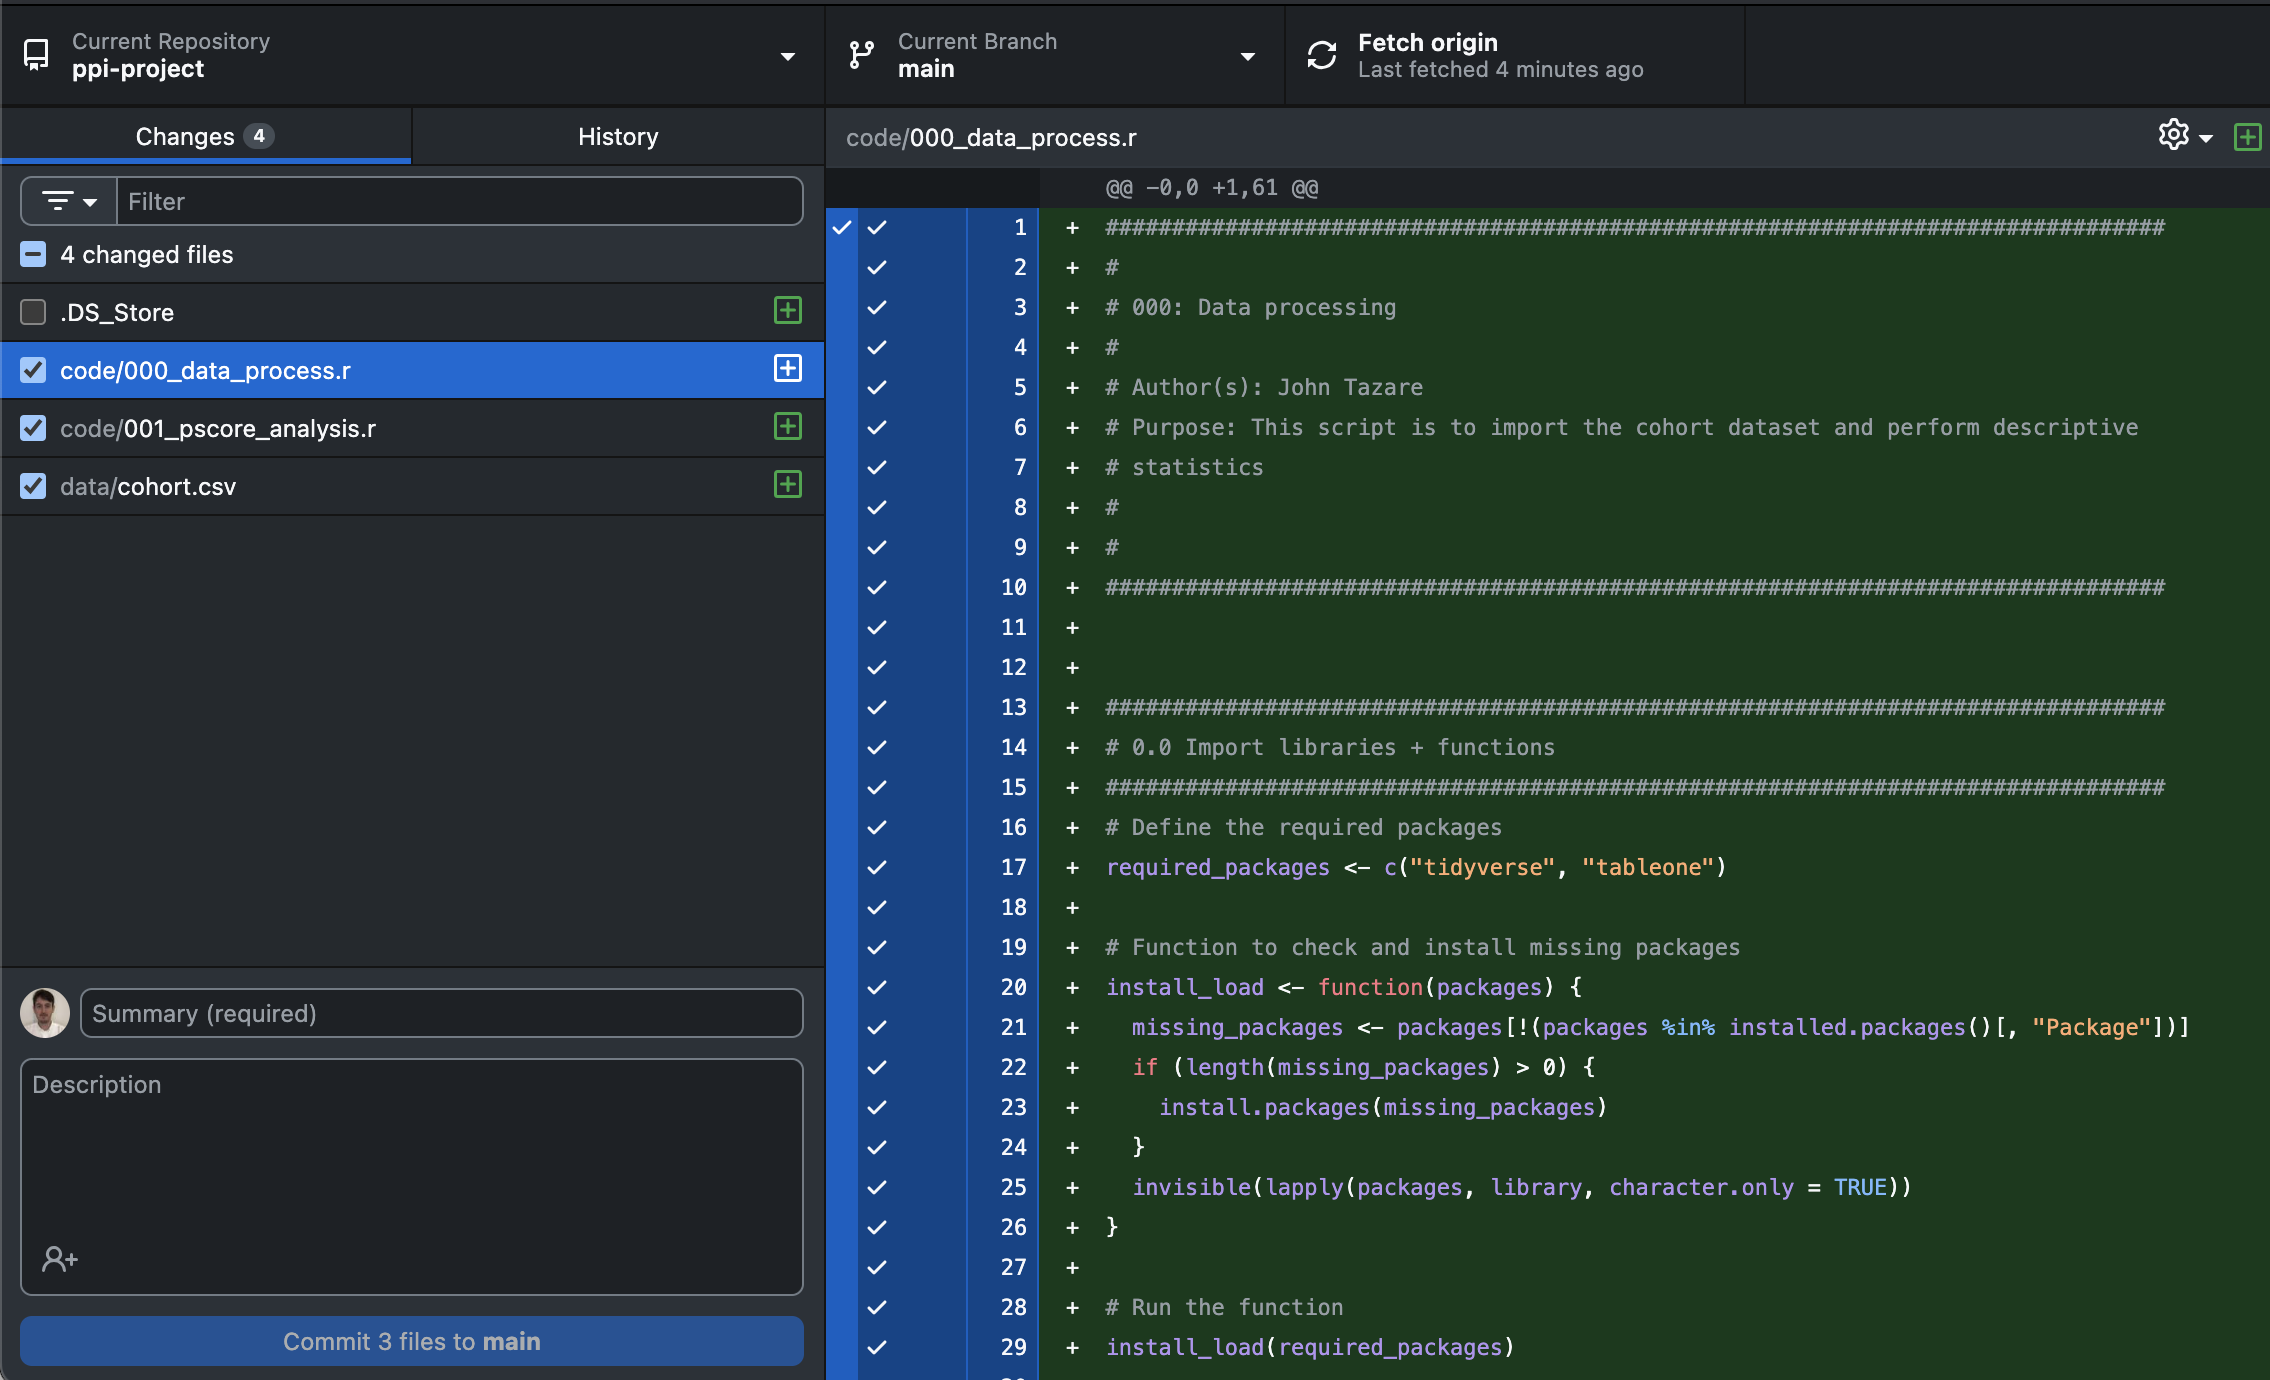
- A note on ‘.gitignores’.
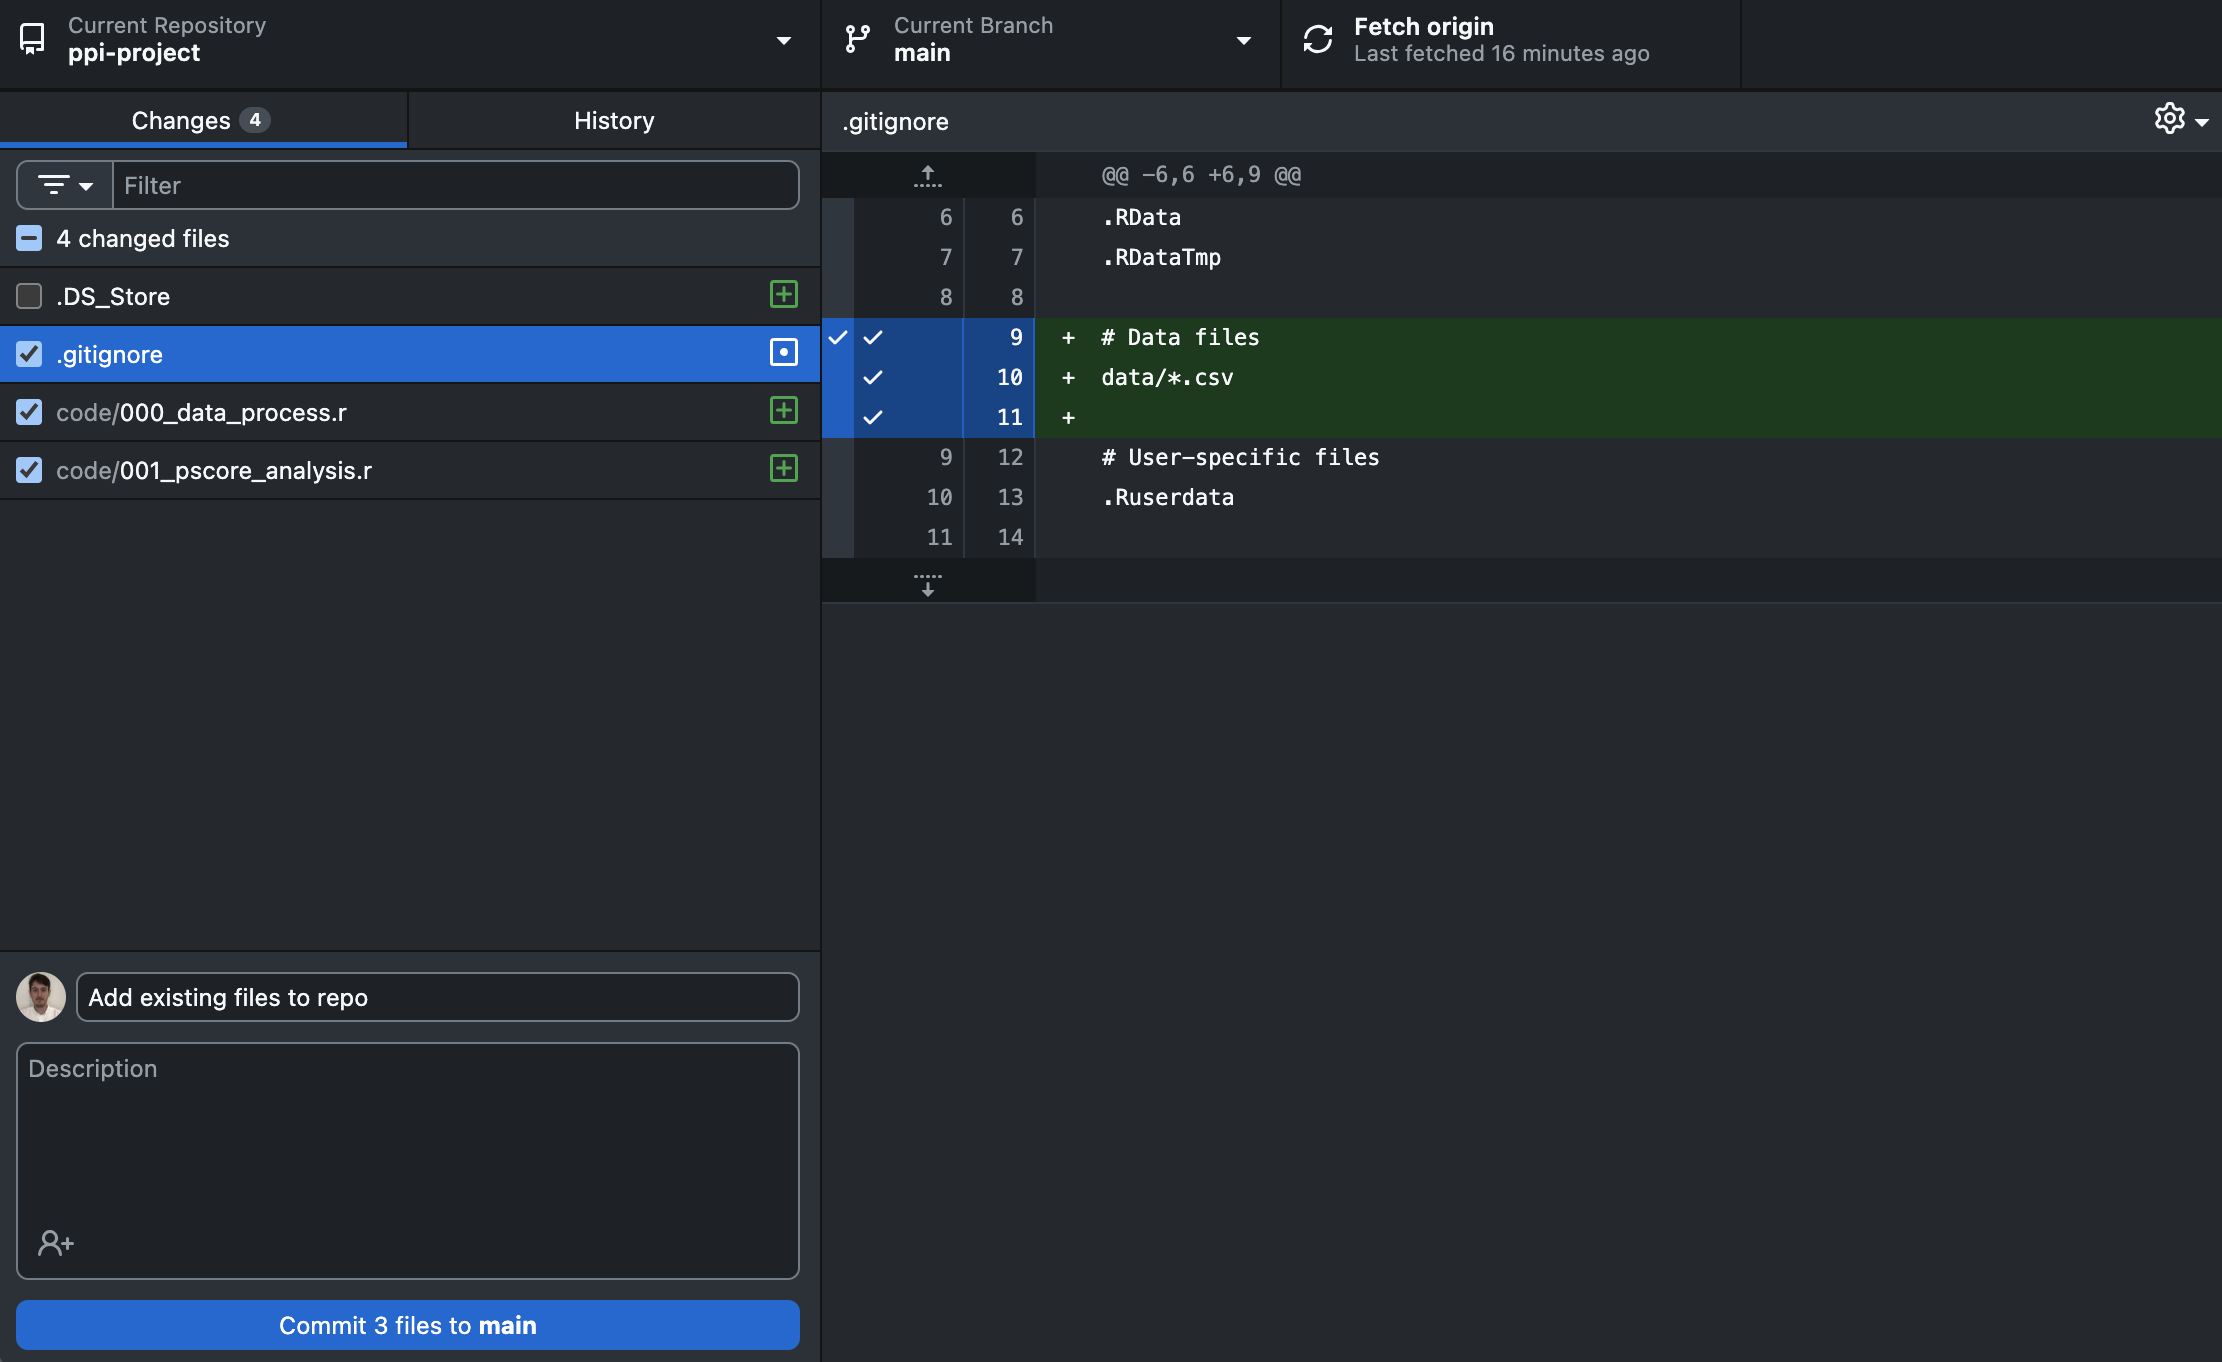
- In this case, we’re using fully simulated and are happy for this to be on GitHub.com. However, usually when working with data from a healthcare database we would not want to upload this to GitHub! One way of avoiding this is to add a folder and/or specific file type to our ‘.gitignore’ file - this stops files meeting these criteria being upload. See below, we’ve added a line to the ‘.gitignore’ file - how has this changed the files we had staged?
5.9.2 Initial commit and push
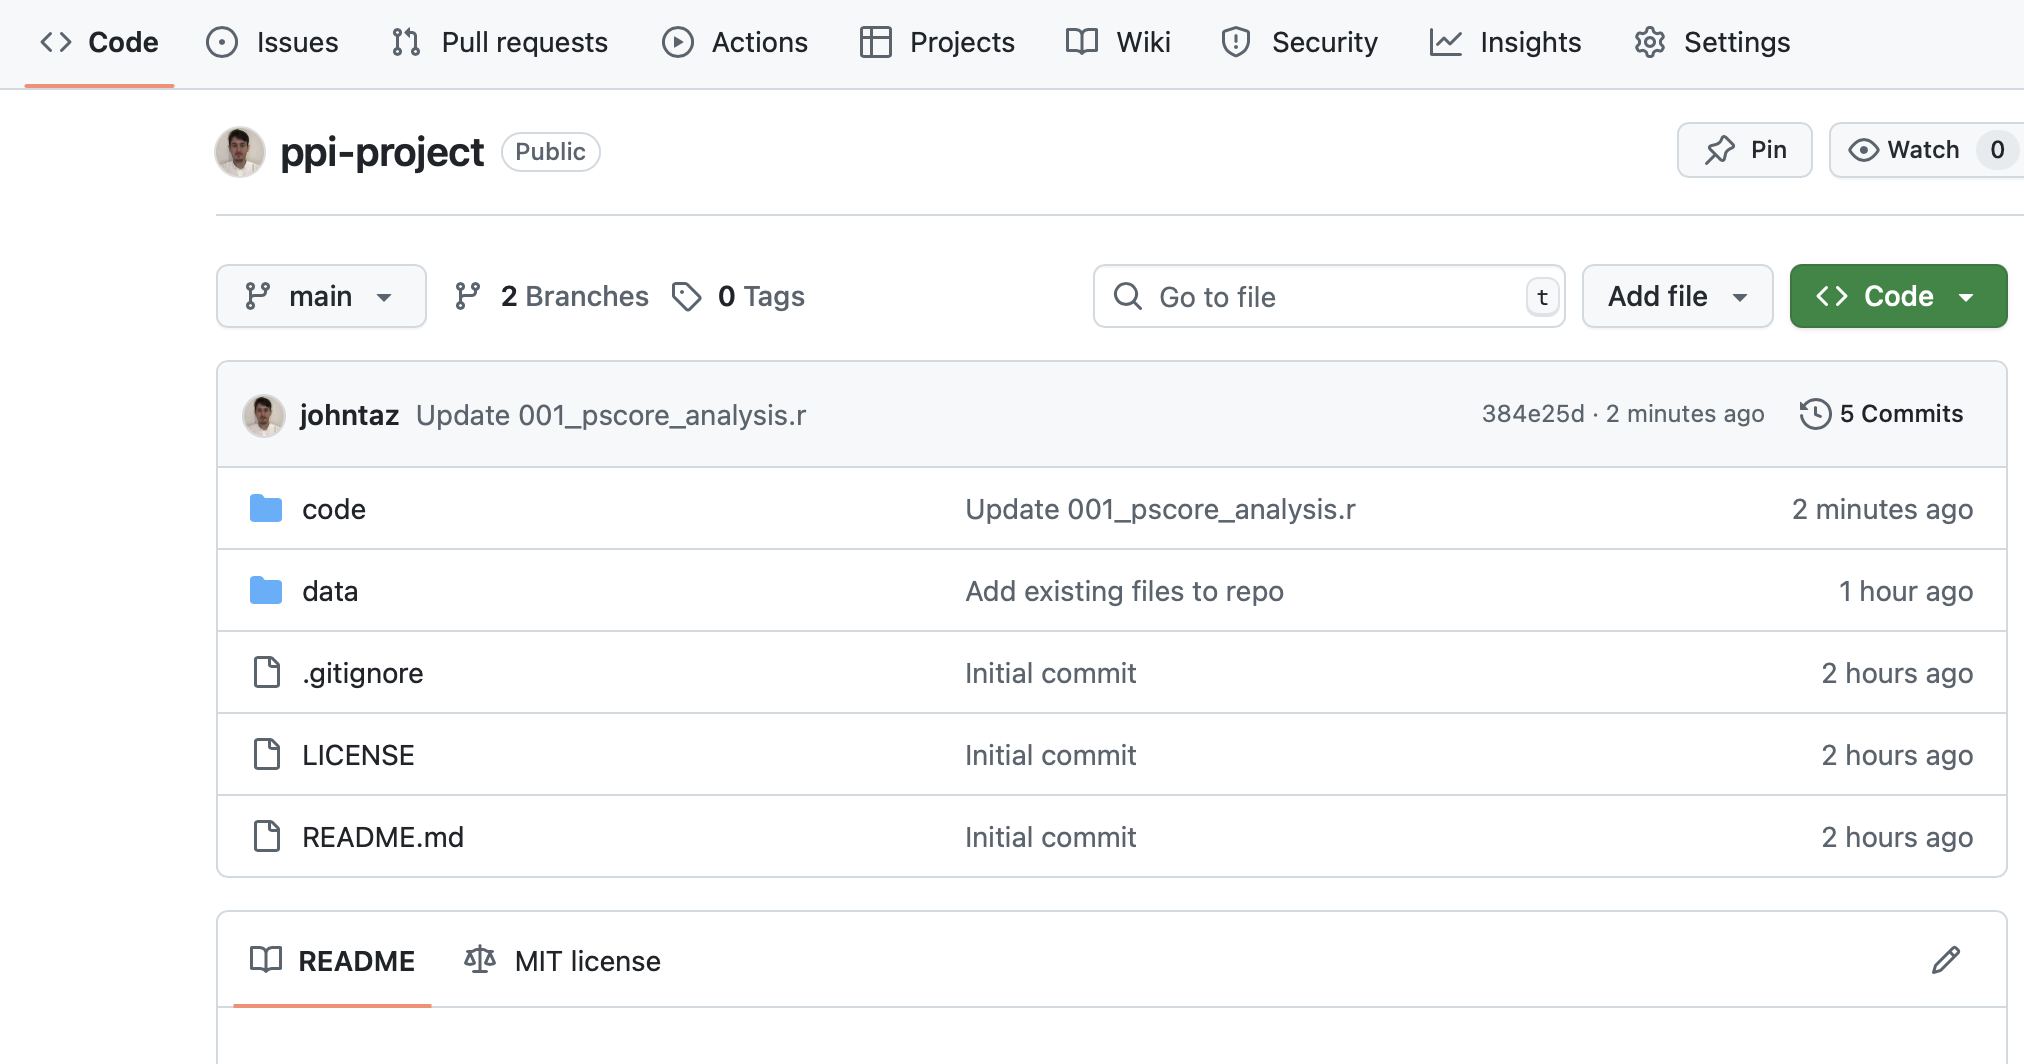
- Add a ‘Commit’ message e.g. “Add existing files to repo”. Click ‘Commit to main’.
- Click Push Origin in the top right-hand corner within the repository bar. Go to check your repository on GitHub.com and see the files!

5.10 Exercise 3: Git across a project
5.10.1 Creating and publishing a branch
At the next meeting, your manager mentions that this project will be able to use a similar propensity score model to the previous project.
However, in this project, as well as including all the variables in the original propensity score model, they ask you to additionally include a variable representing history of hypertension (called ‘hyper’ in the dataset).
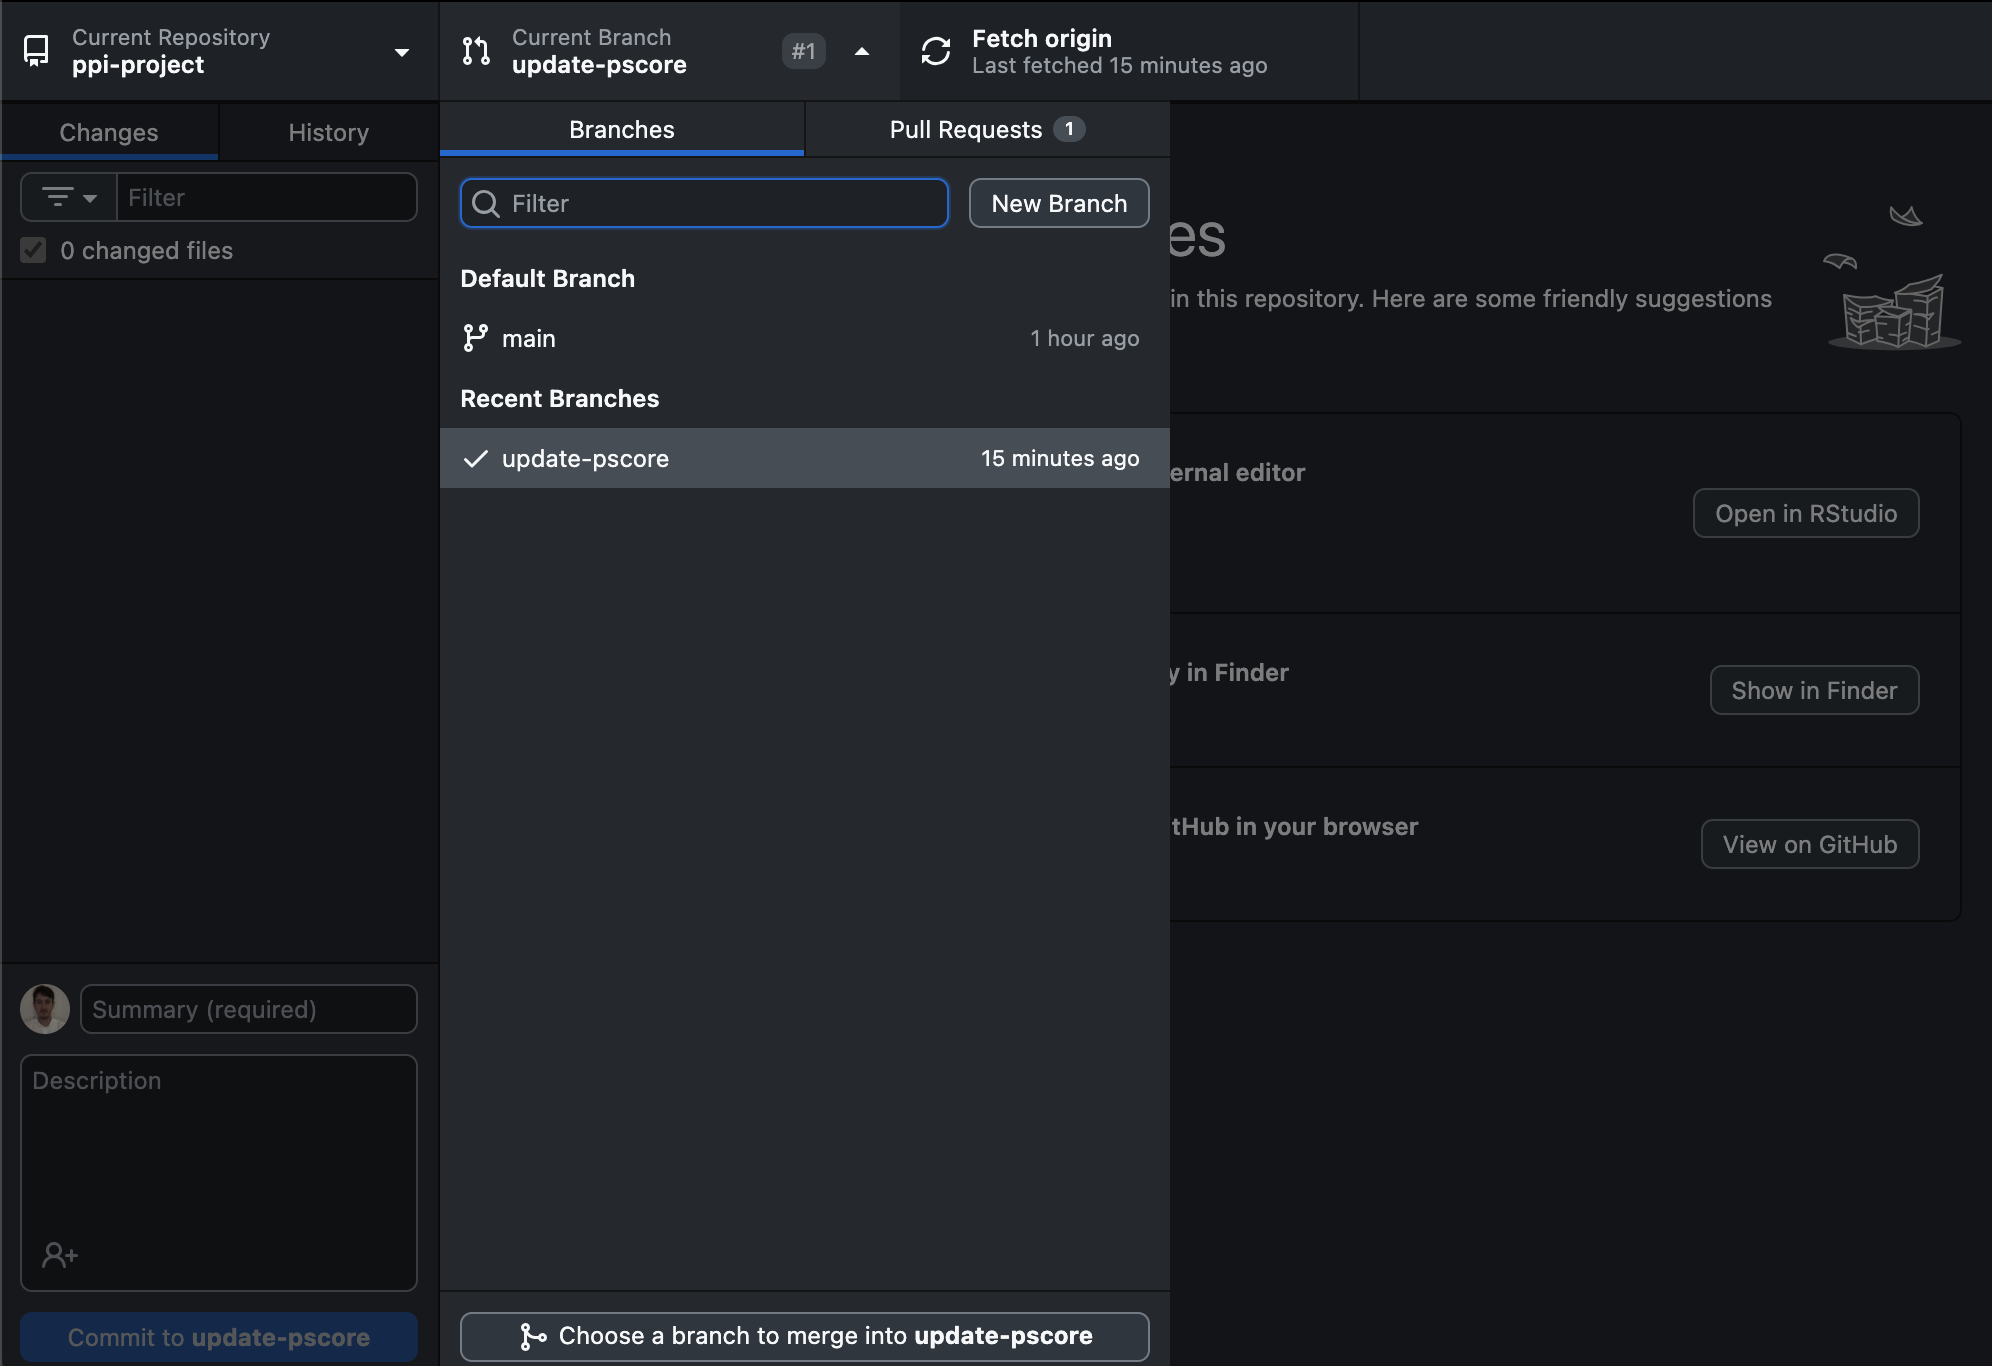
Return to GitHub Desktop and click ‘Fetch origin’ (nothing should happen if the files are up-to-date, but this is a good habit!).
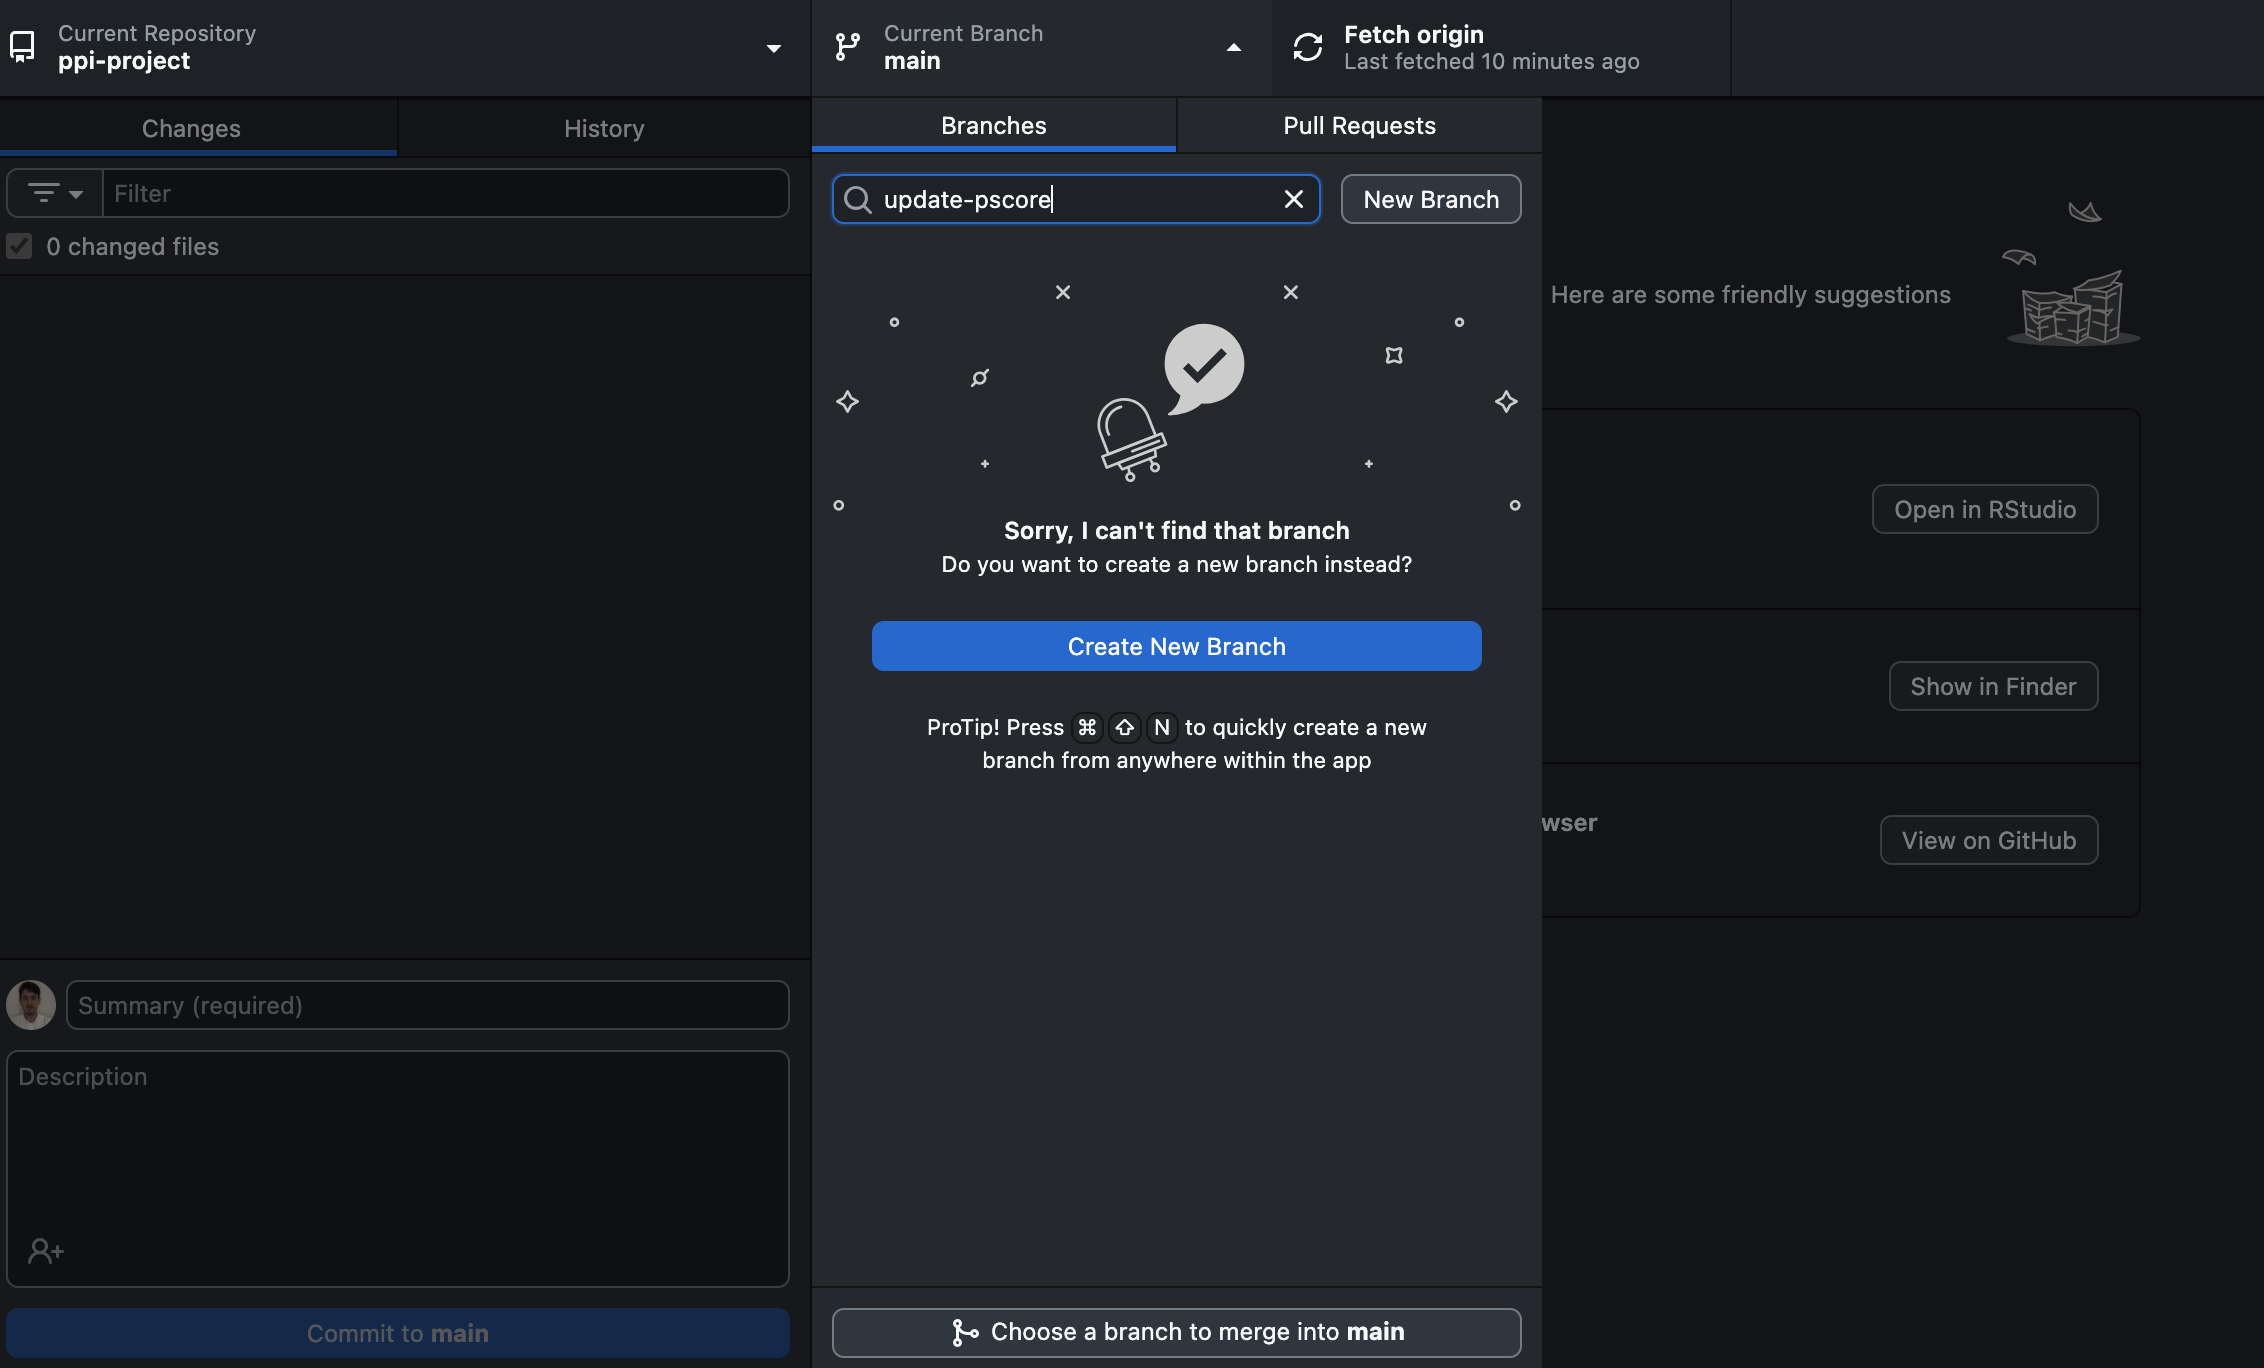
To update this file, we’re going to first create a Branch. Click the ‘Current Branch’ tab within the repository bar and add a name for the Branch e.g. ‘update-pscore’. Click ‘New Branch’
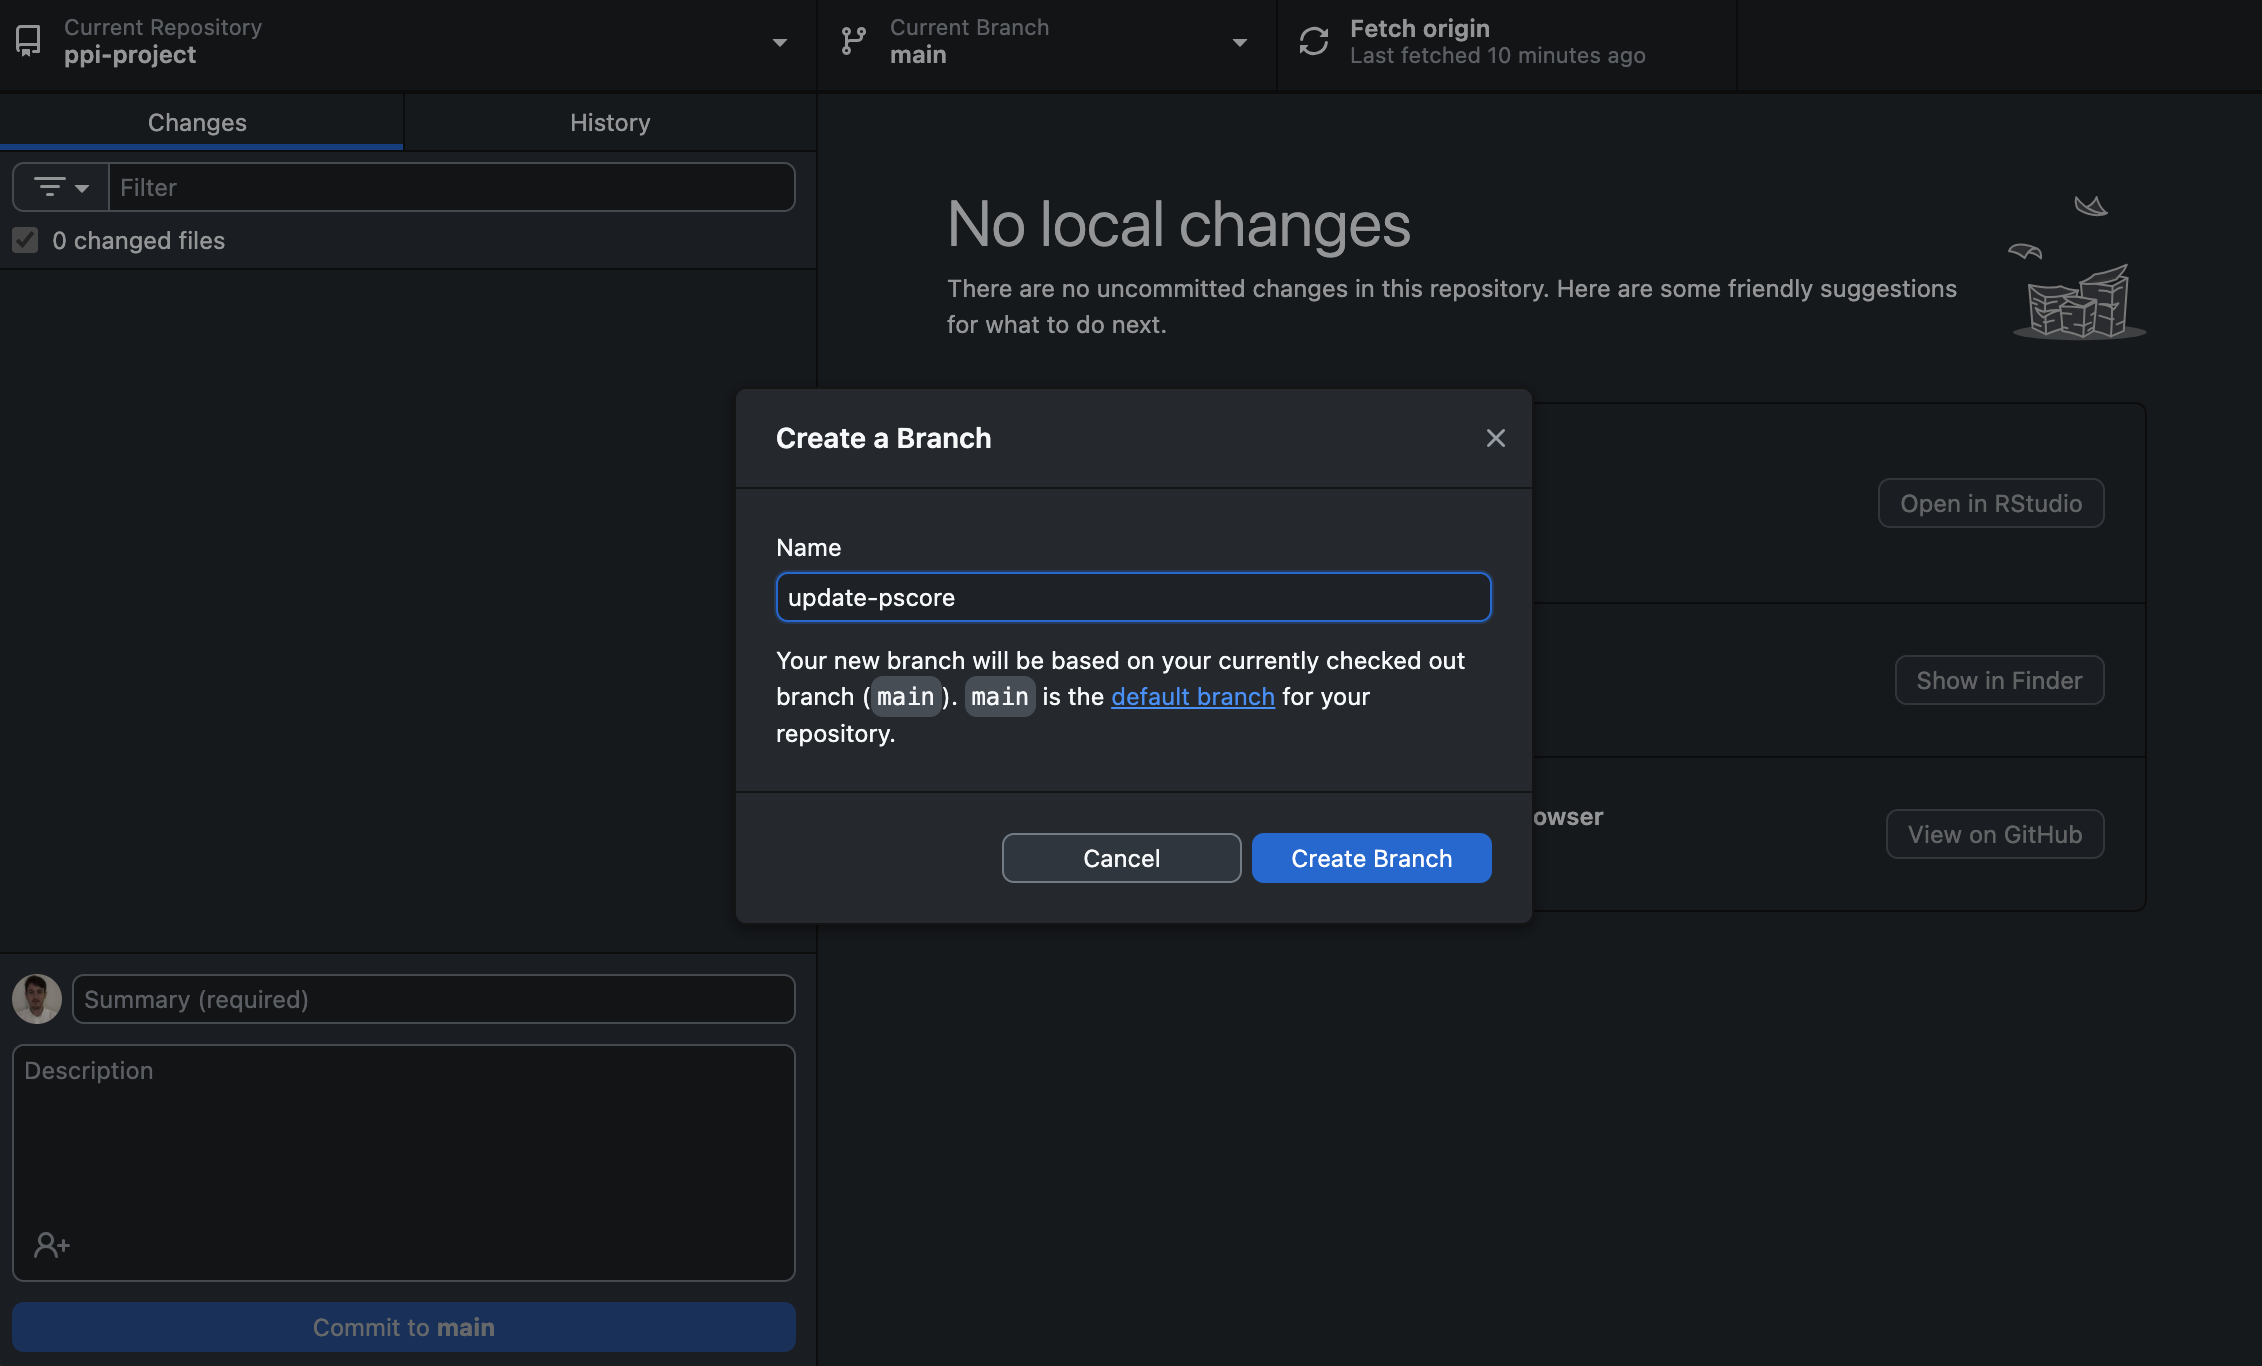
- The following pop-up should appear - Click ‘Create Branch’.
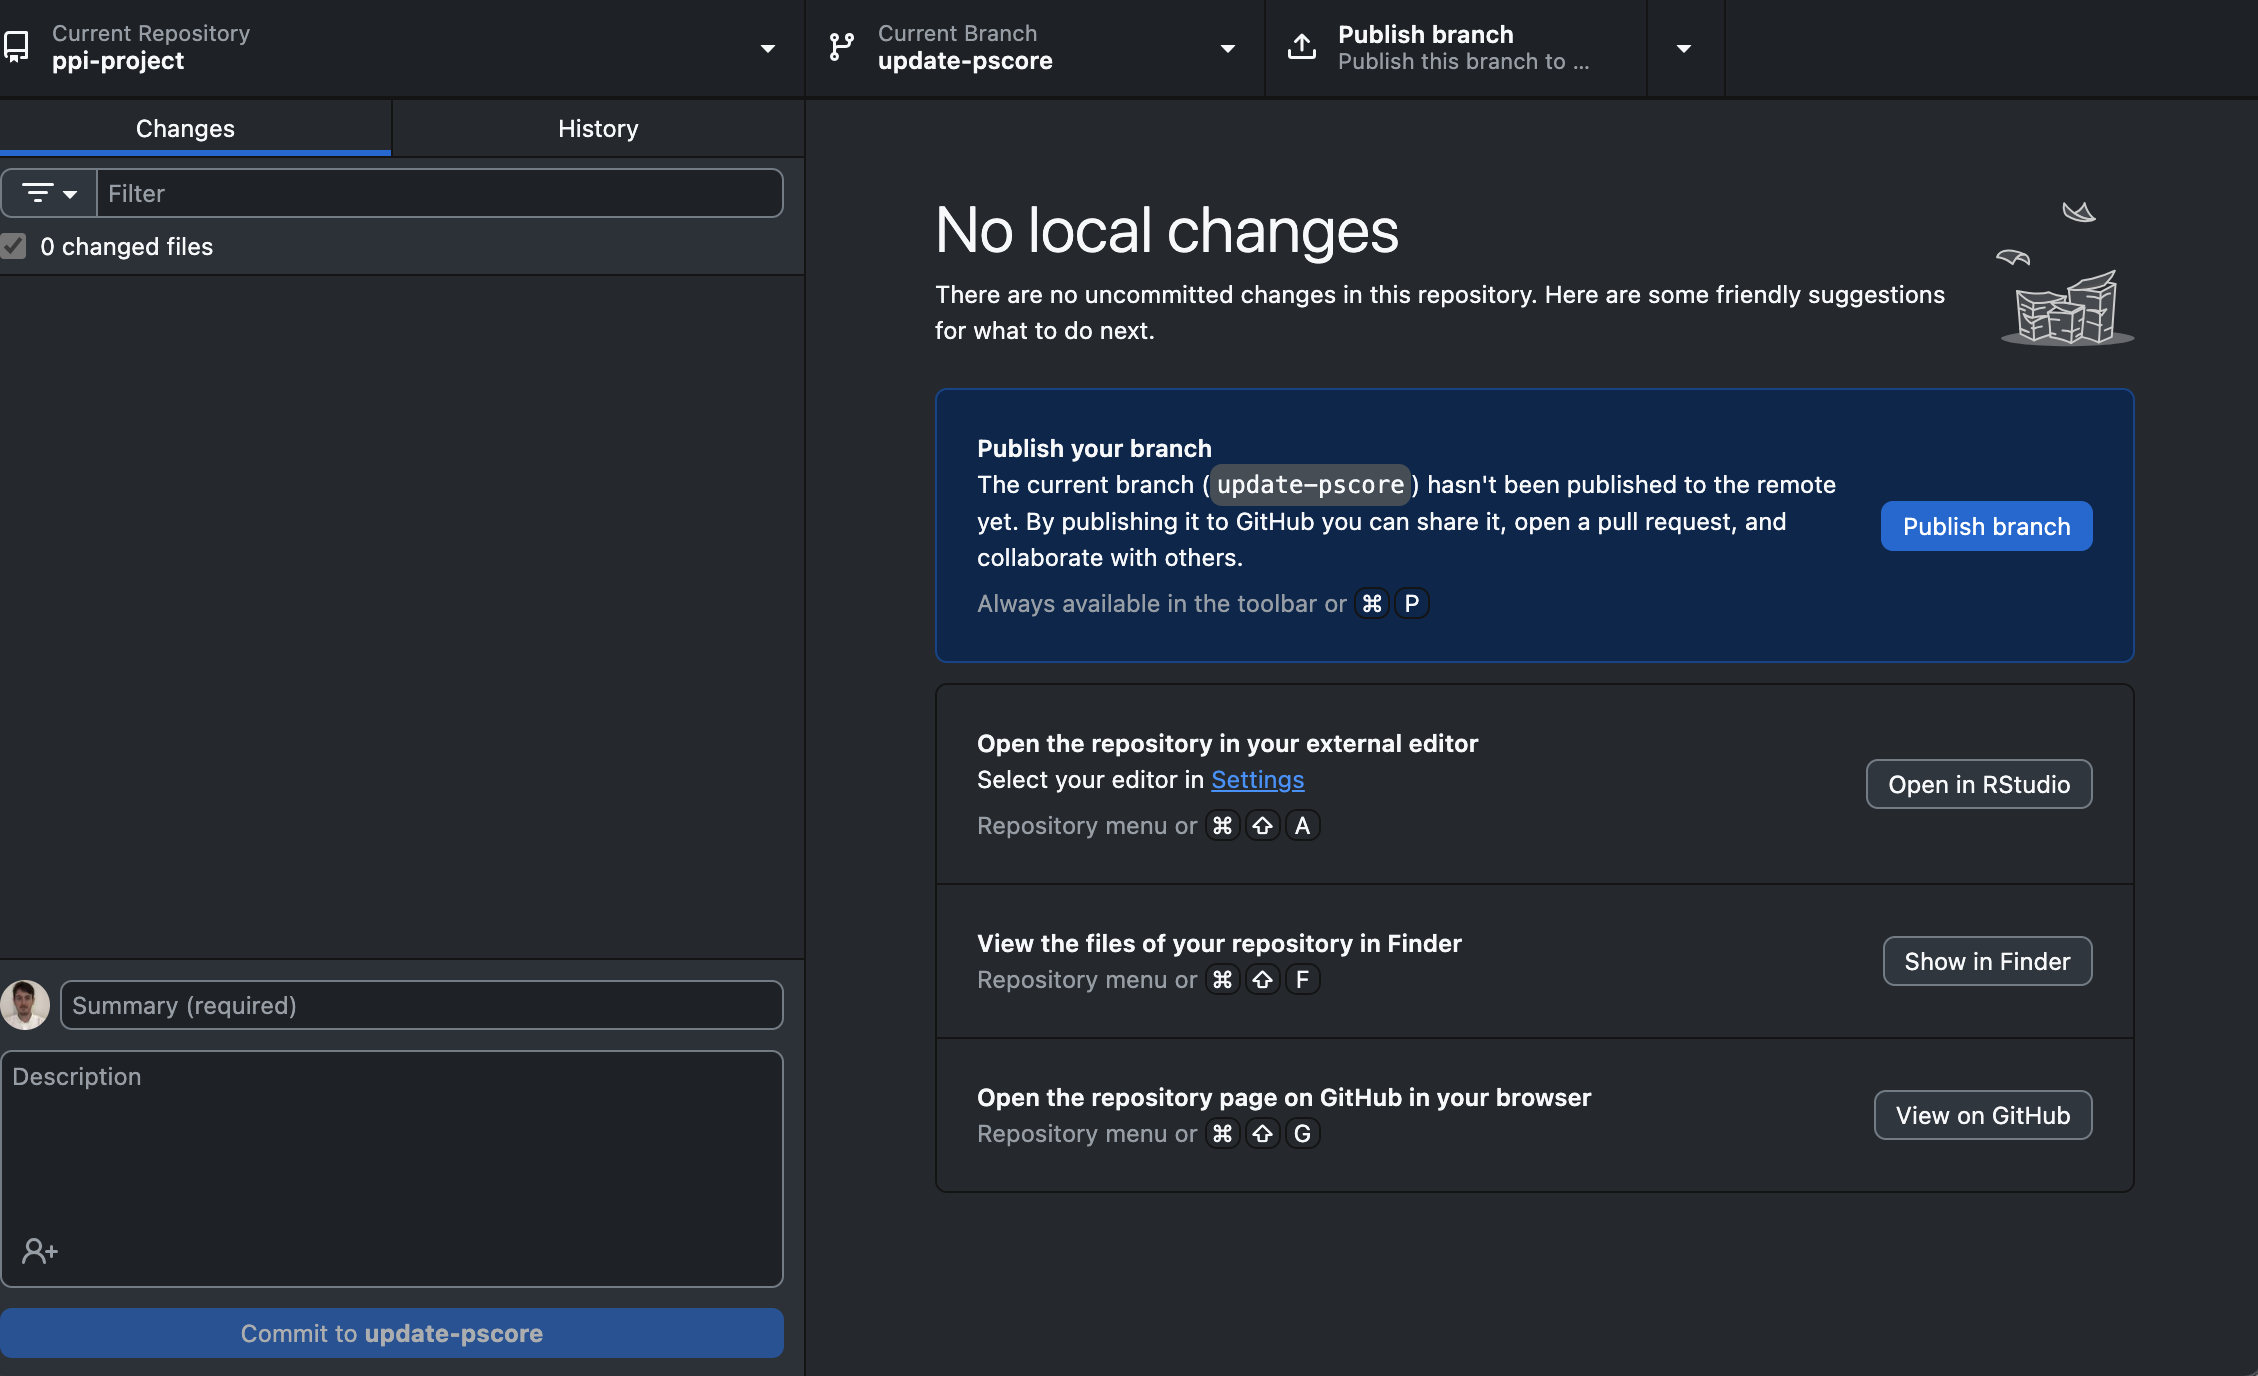
- Click ‘Publish Branch’ in the top right-hand corner of the repository bar
5.10.2 Updating a file
Navigate to your local repository. Open the ‘code’ subfolder and then open the ‘001_pscore_analysis.R’ file either in R Studio or any text editor available (Notepad, TextEdit, Visual Studio etc).
We need to add the hypertension variable (i.e. ‘+ hyper’) to our propensity score model and model diagnostics (Lines 46, 72, 77).
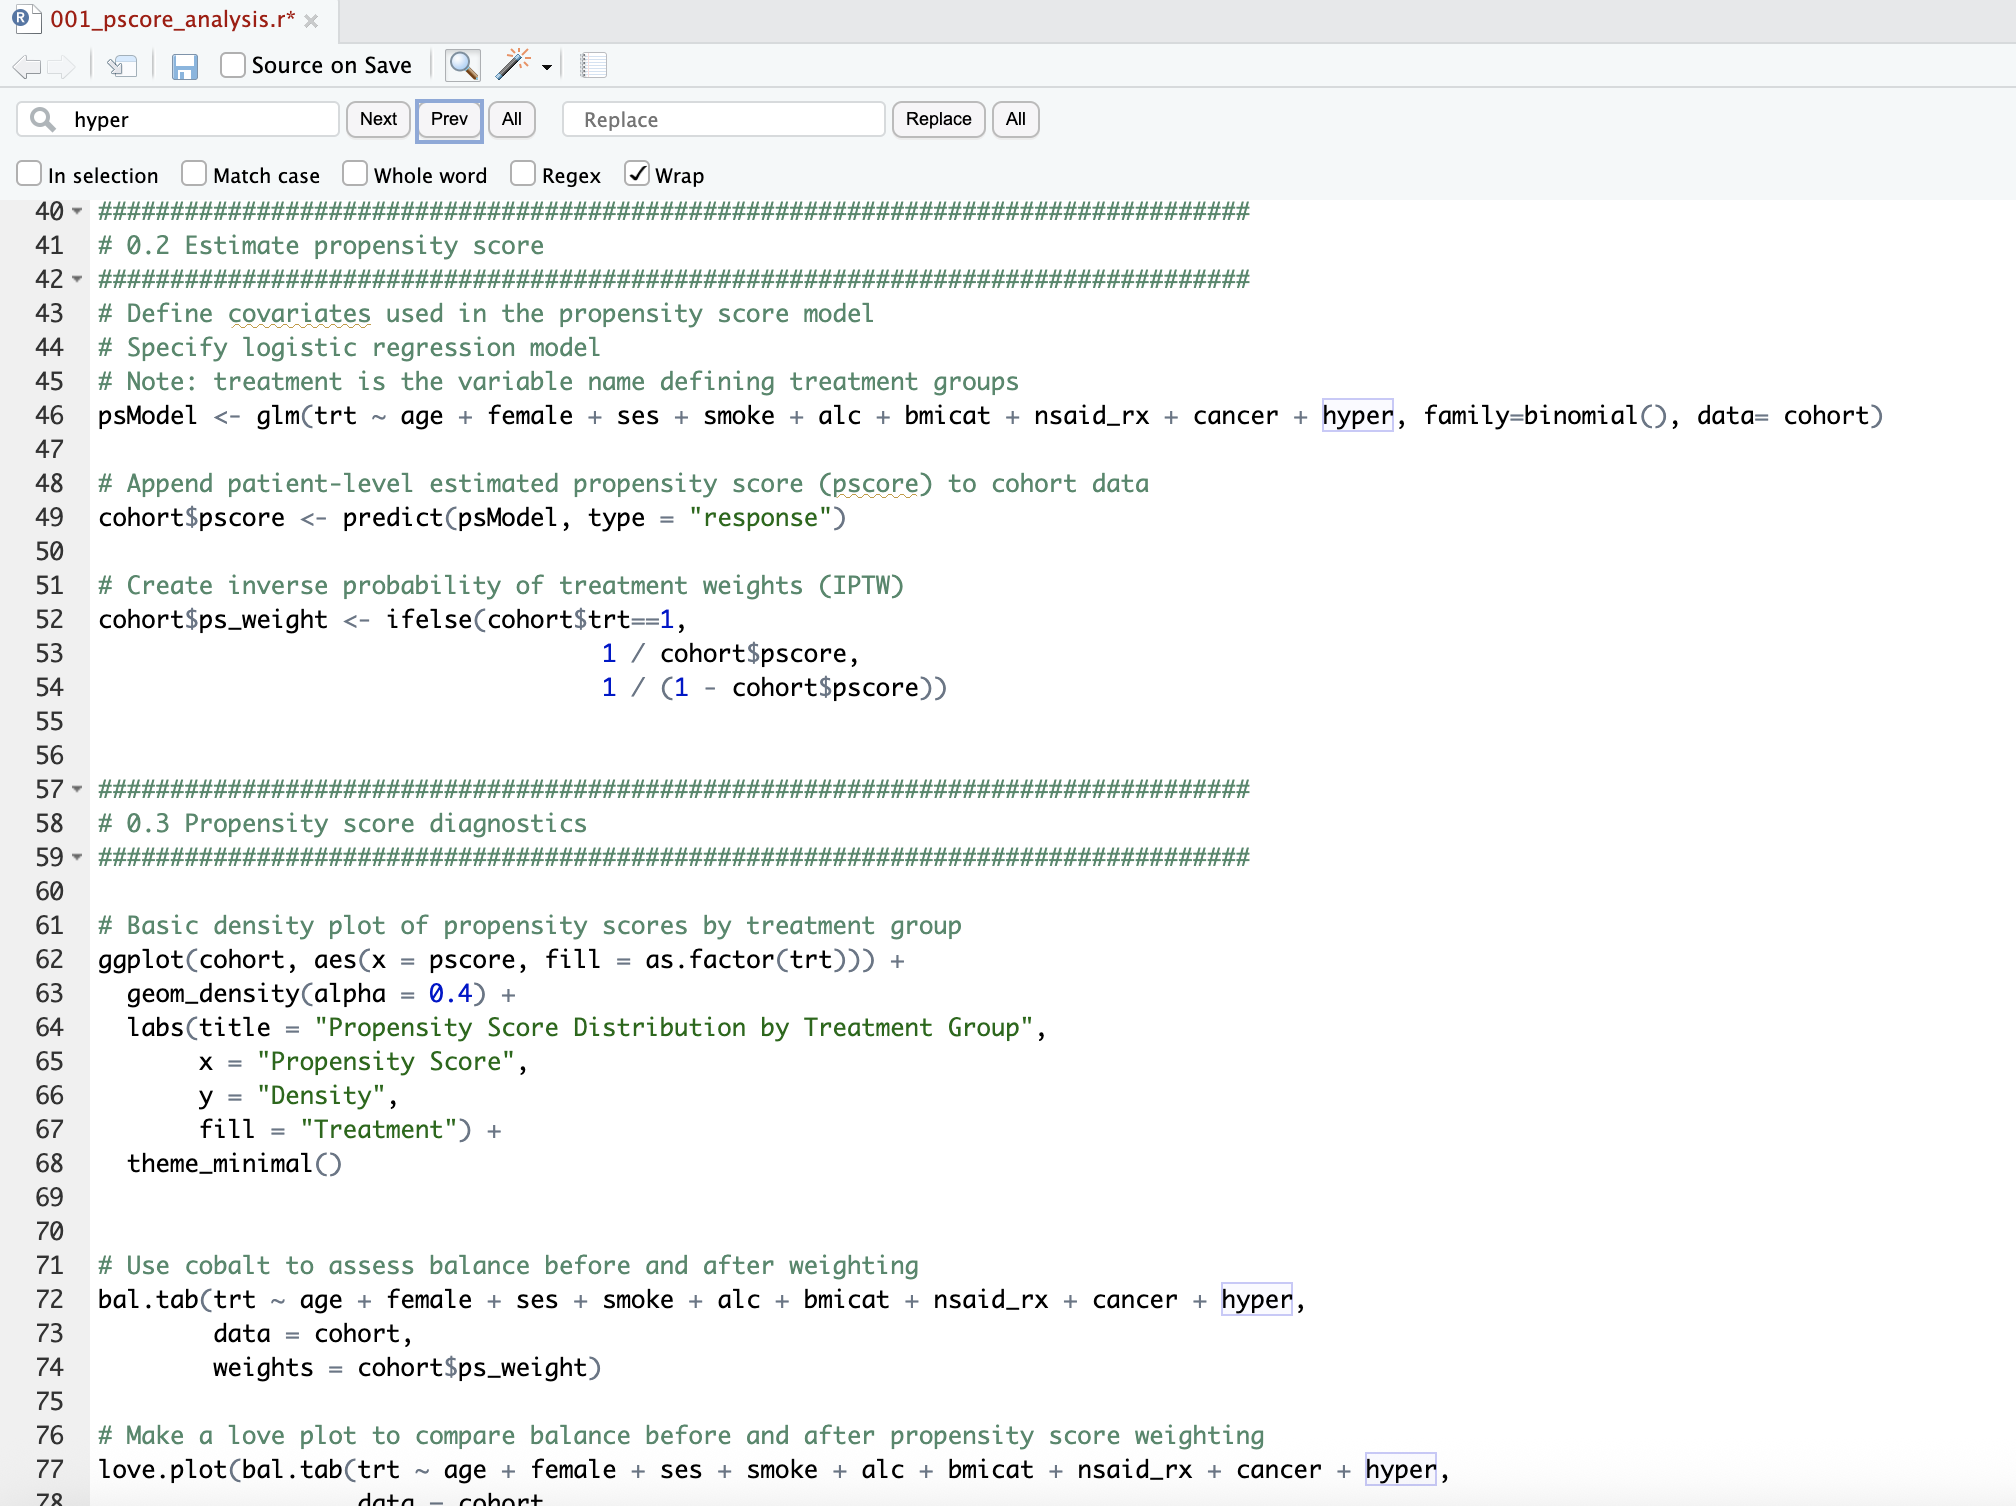
Save the updated file (do not change the file name) and return to GitHub Desktop.
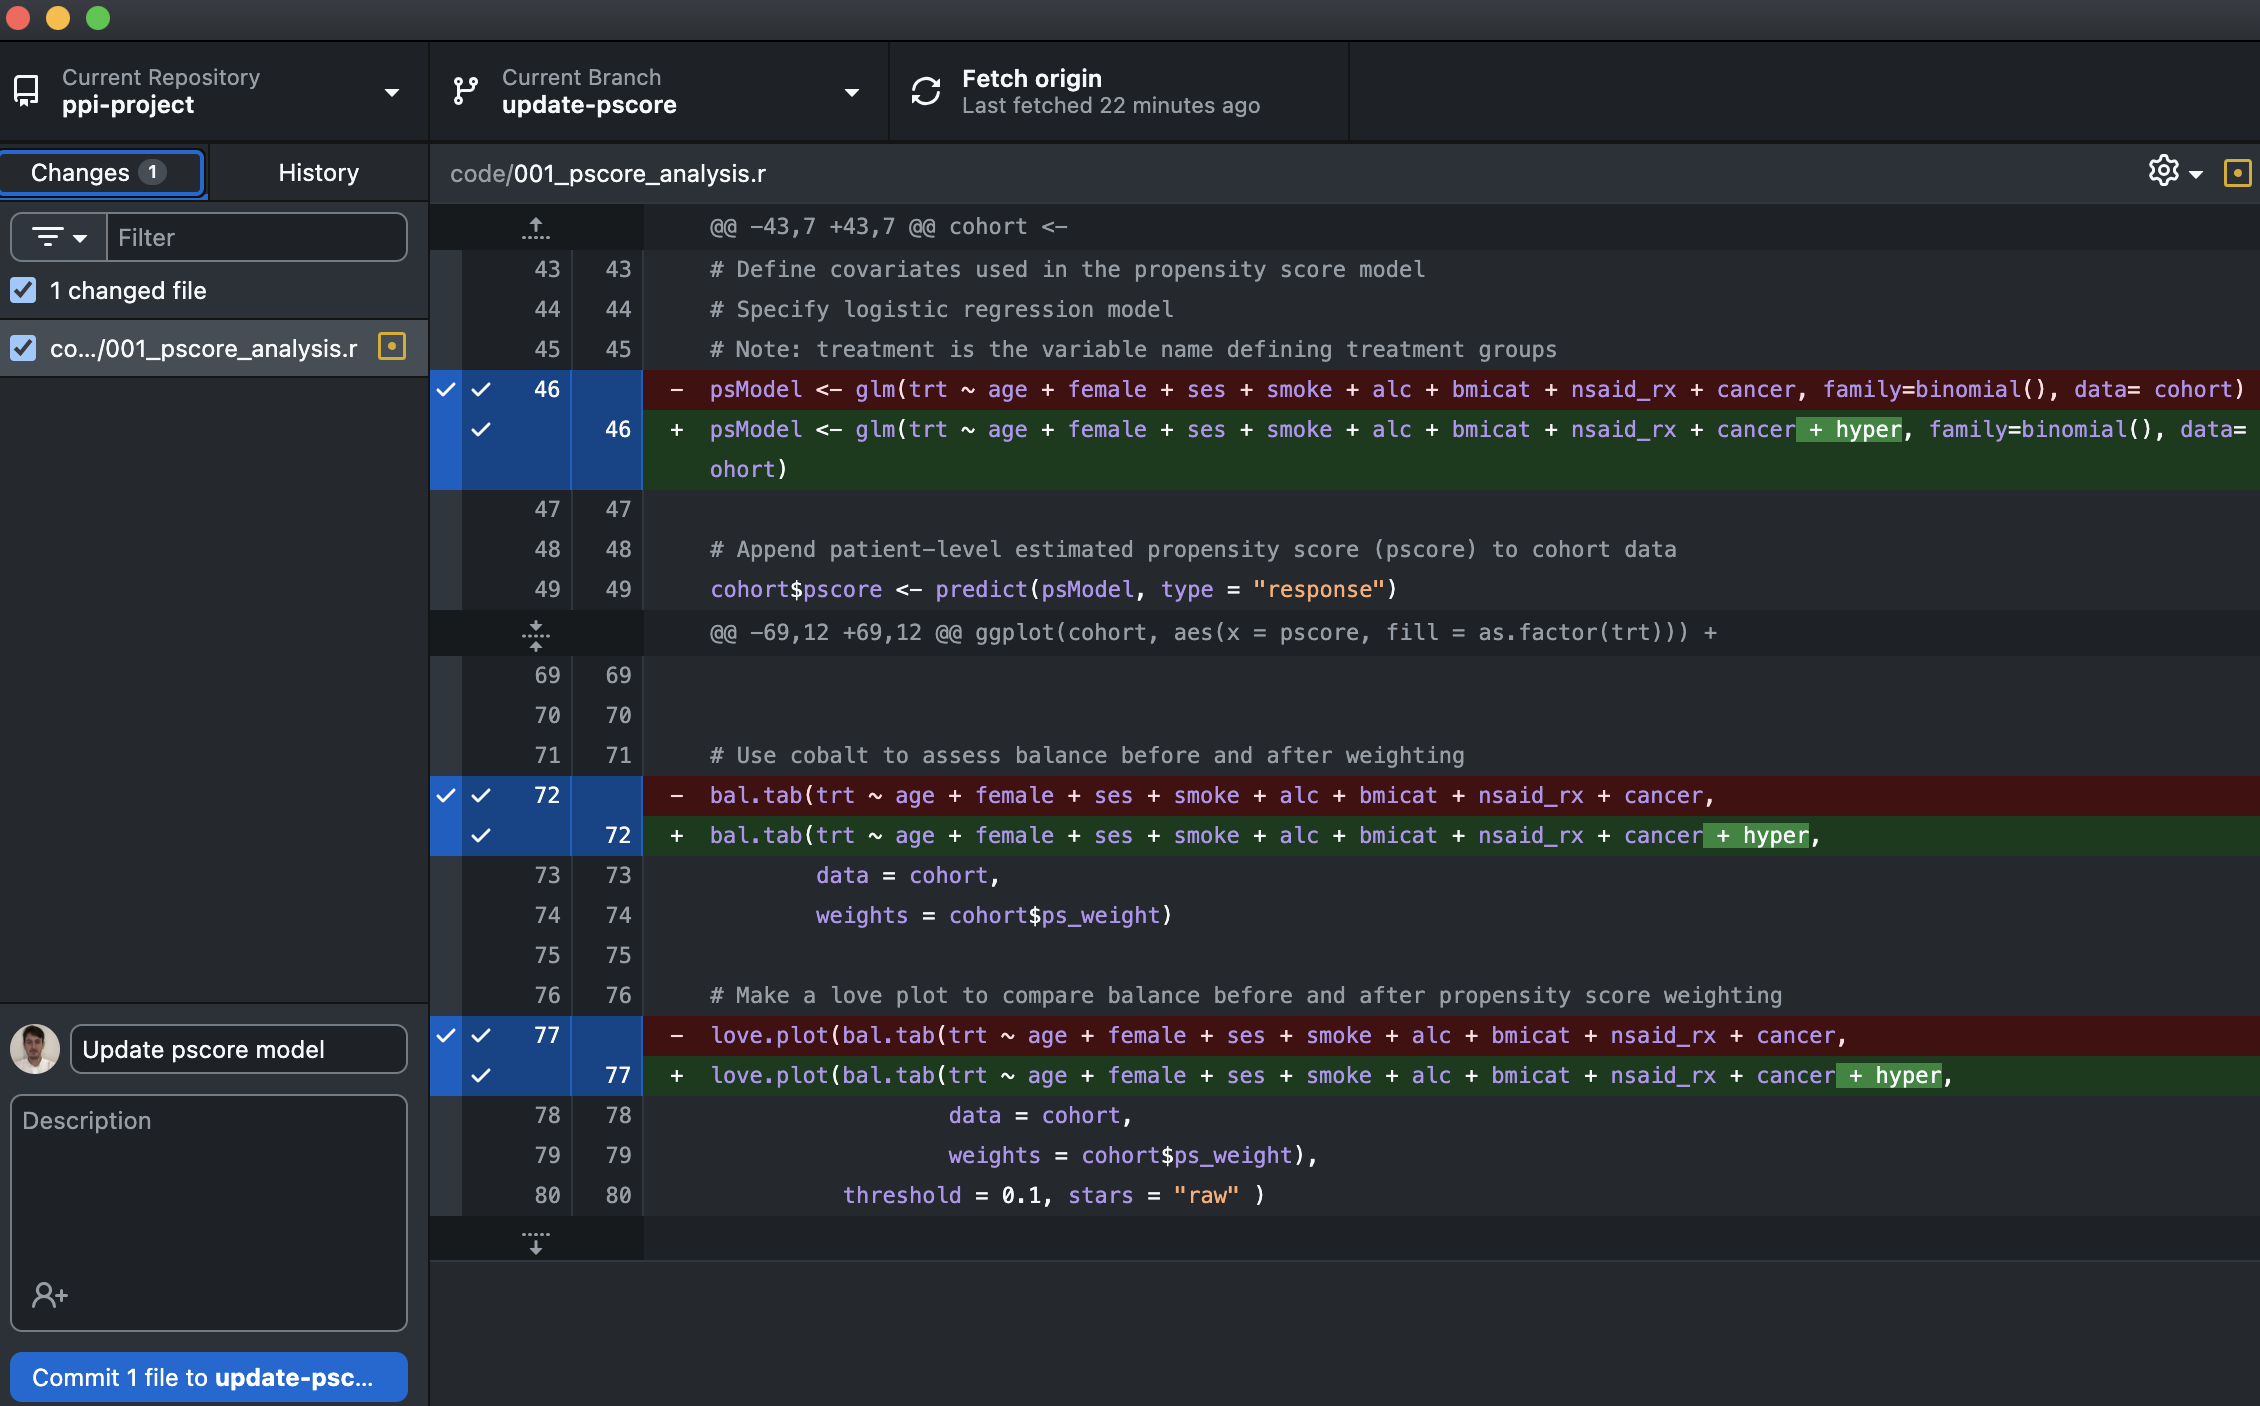
You should now see the edited file in the ‘Change Files’ window. Check this file is ticked (staged). Check the correct variable has been added in the diff window.
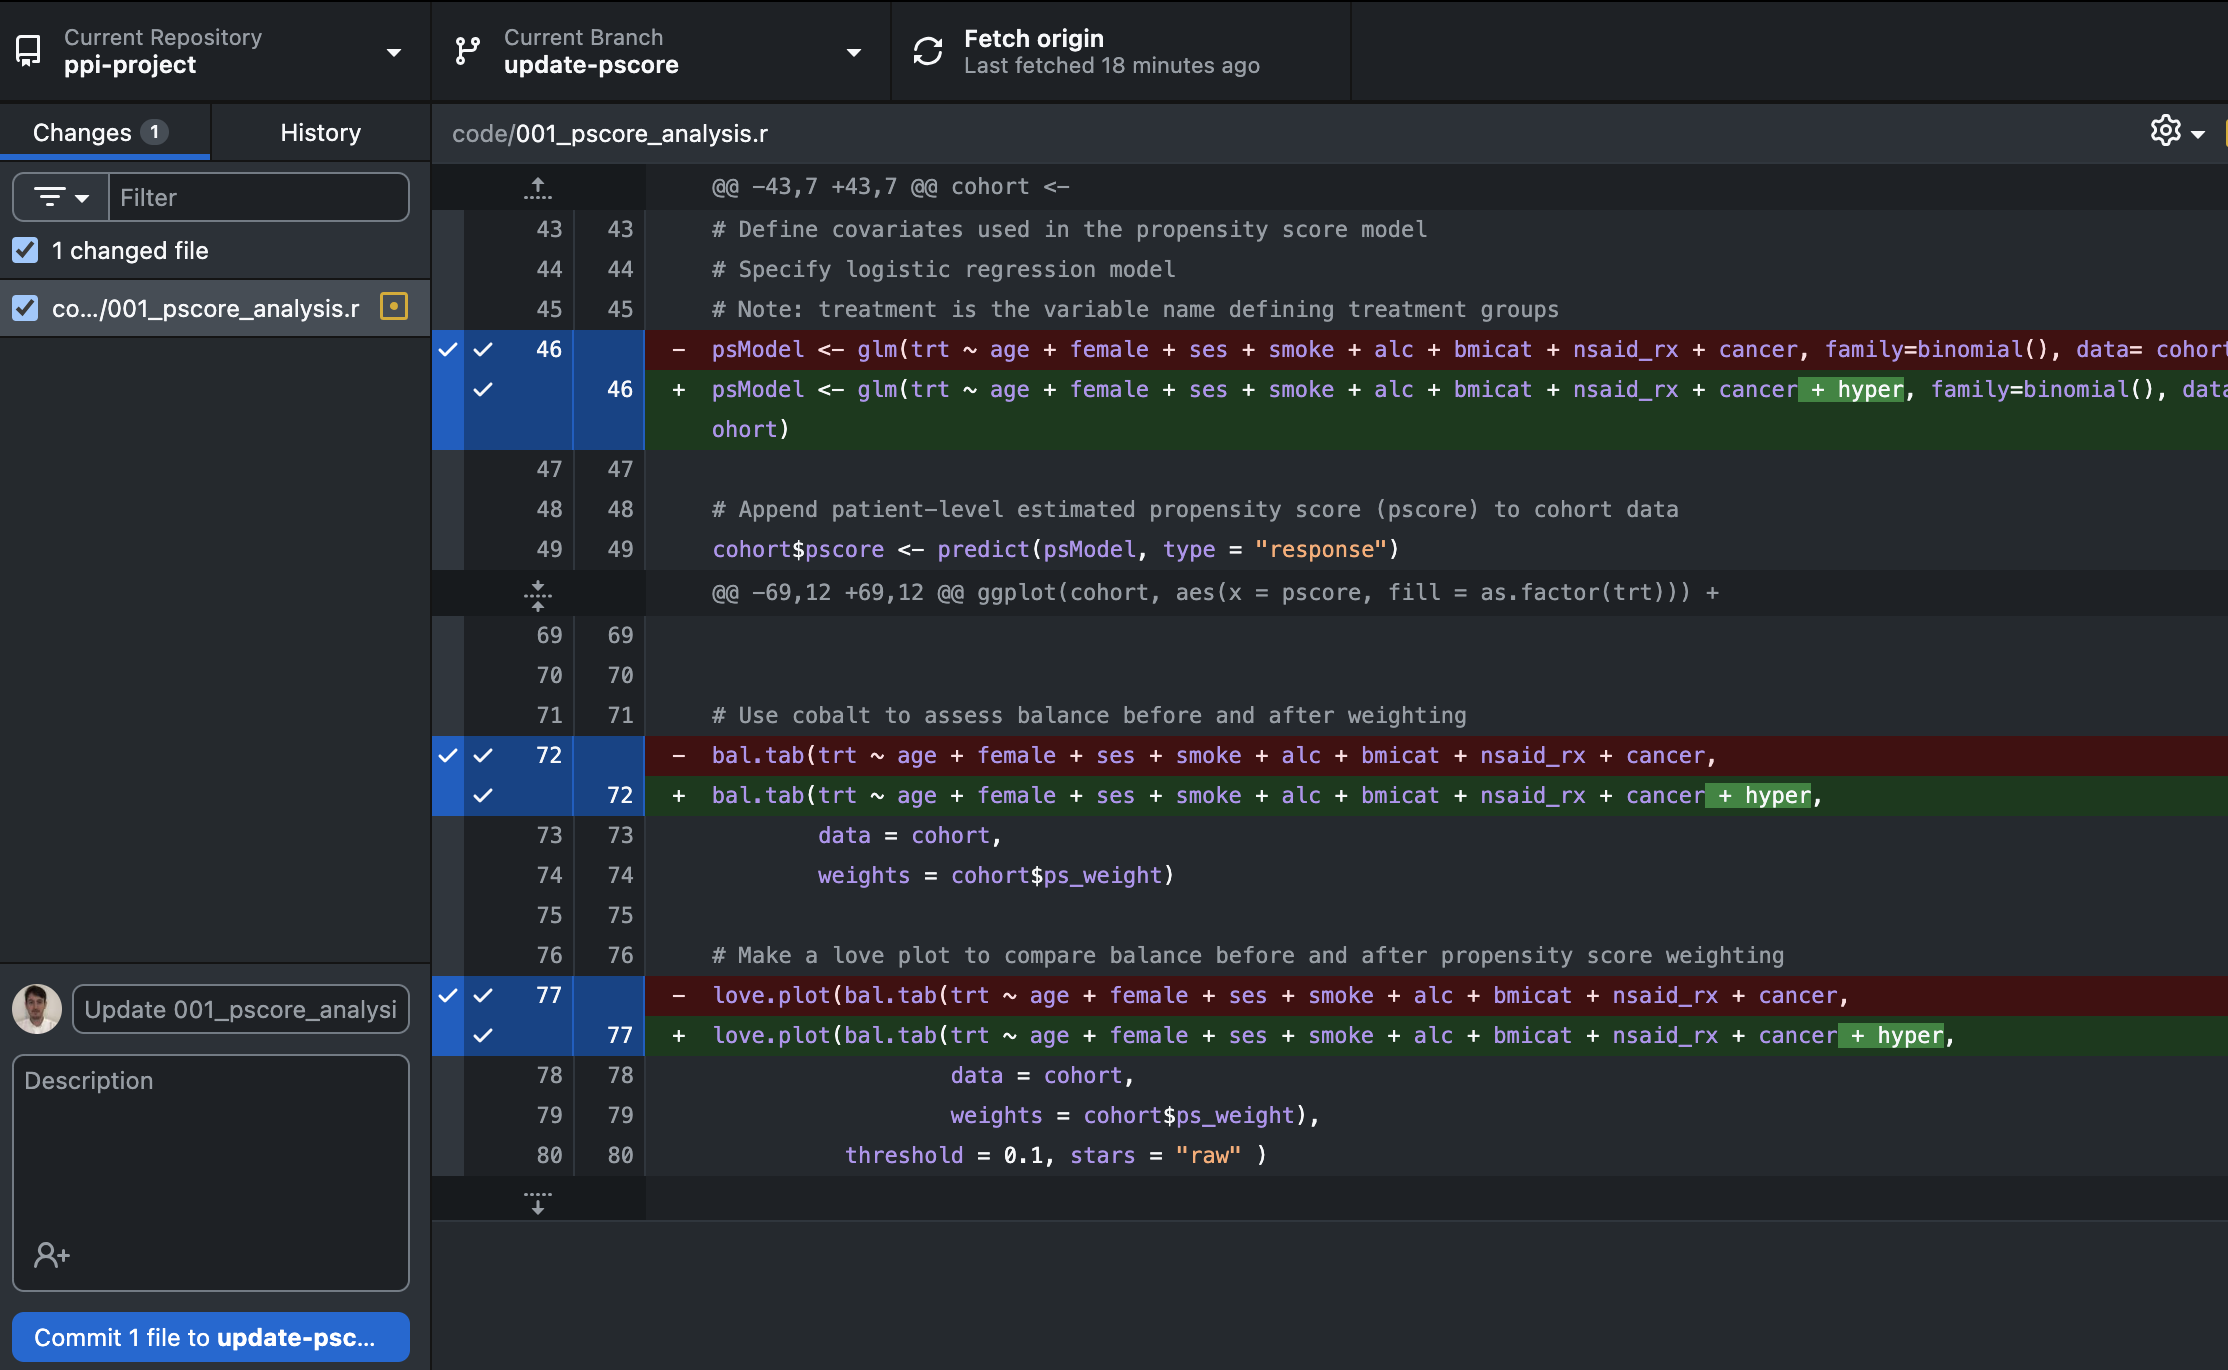 5. Add a ‘Commit message’, e.g. ‘Update pscore model’. Click ‘Commit to update-pscore’.
- Click Push Origin in the top right-hand corner within the repository bar.
5.10.3 Creating a pull request
Now we have made the changes on our ‘update-pscore’ branch, let’s merge these into the ‘main’ branch.
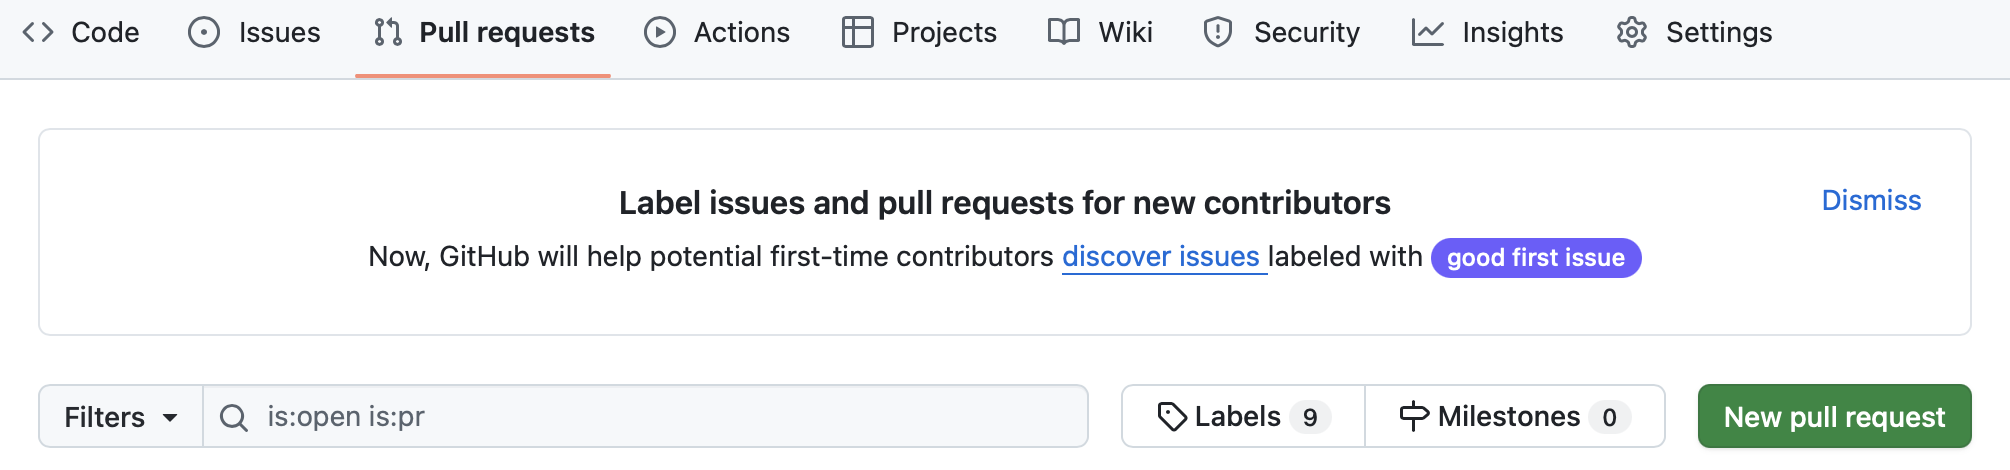
- Navigate to your repository at GitHub.com. Select the ‘Pull requests’ tab.
 2. Click New pull request.
- We want to compare the ‘main’ branch to our ‘update-pscore’ branch. Select ‘update-pscore’ brnach from the ‘compare’ drop-down menu.
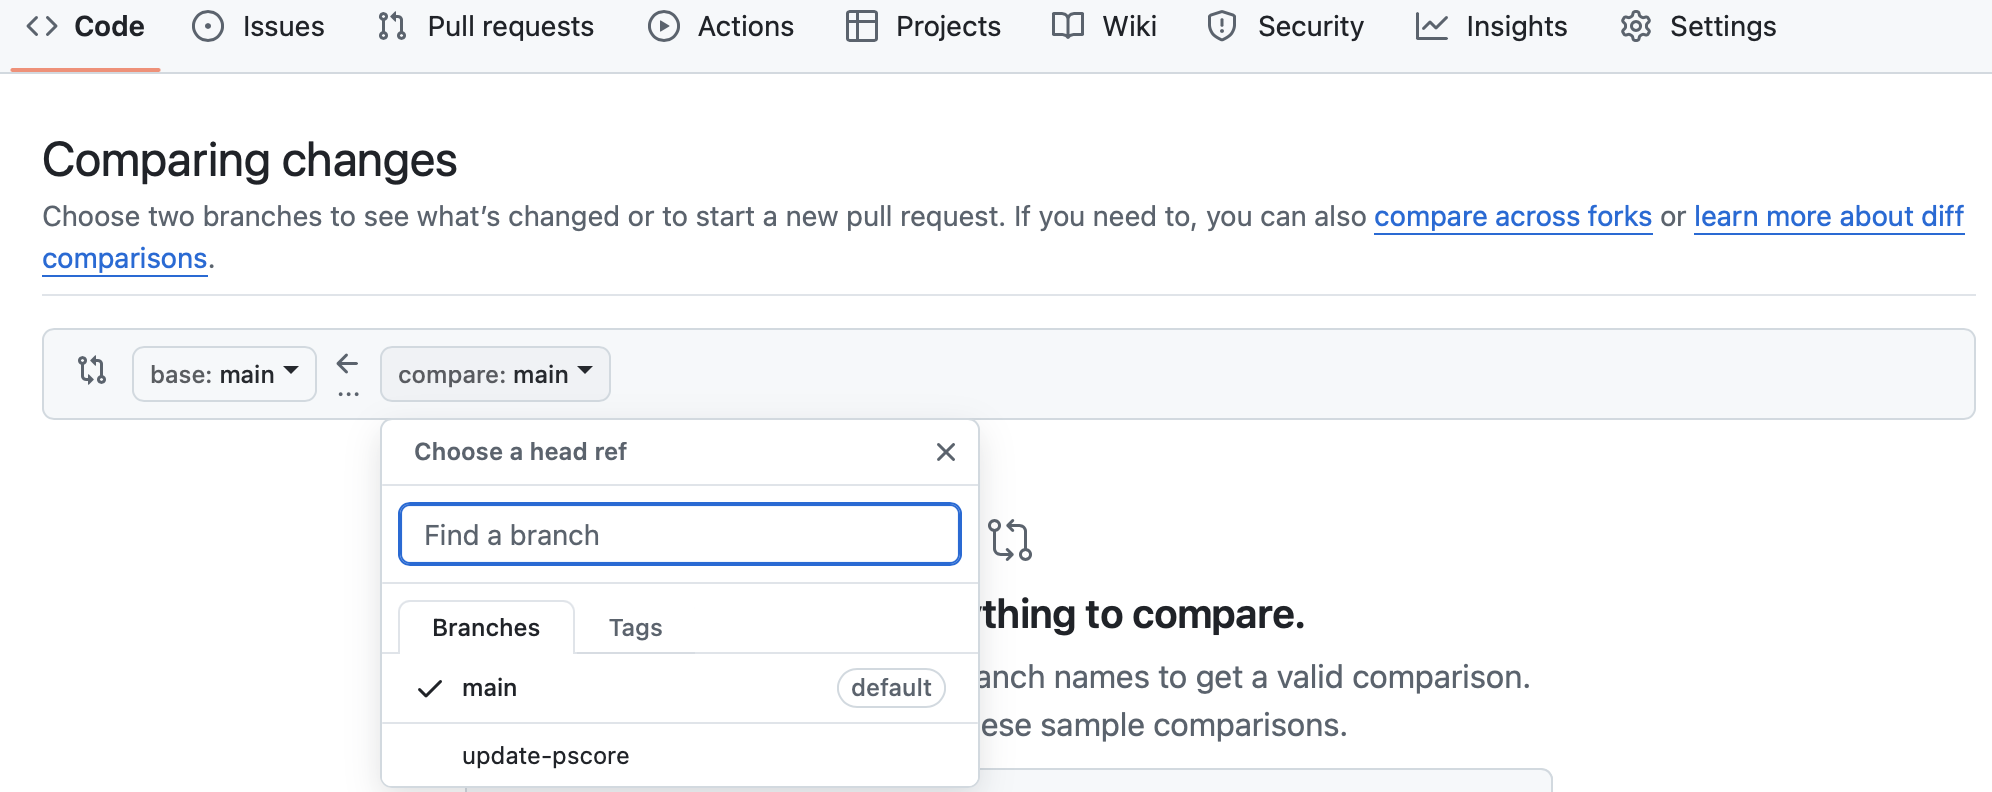 4. Once the ‘Comparing changes’ page updates to show the update file(s), click Create pull request.
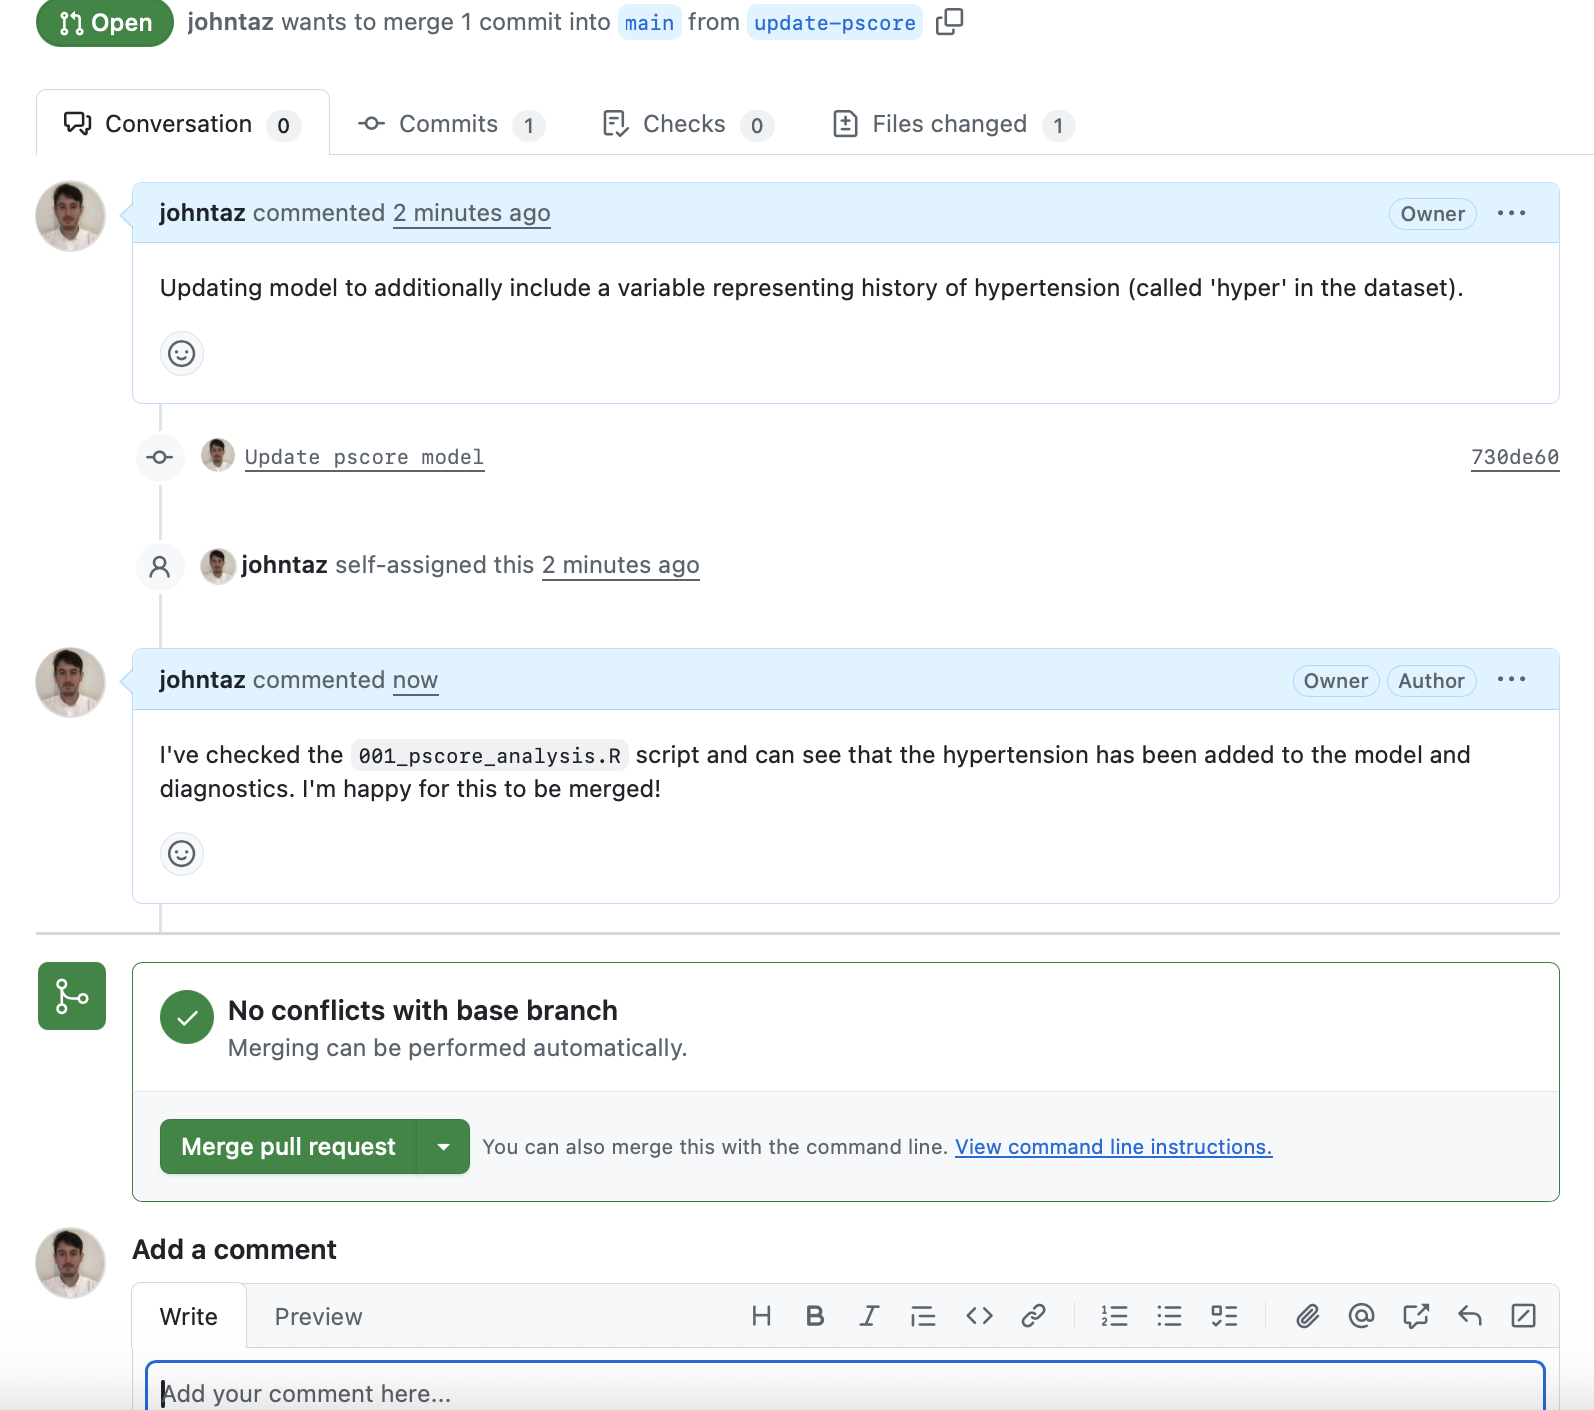
 5. Add a description about the purpose of the pull request. Click Create pull request.
 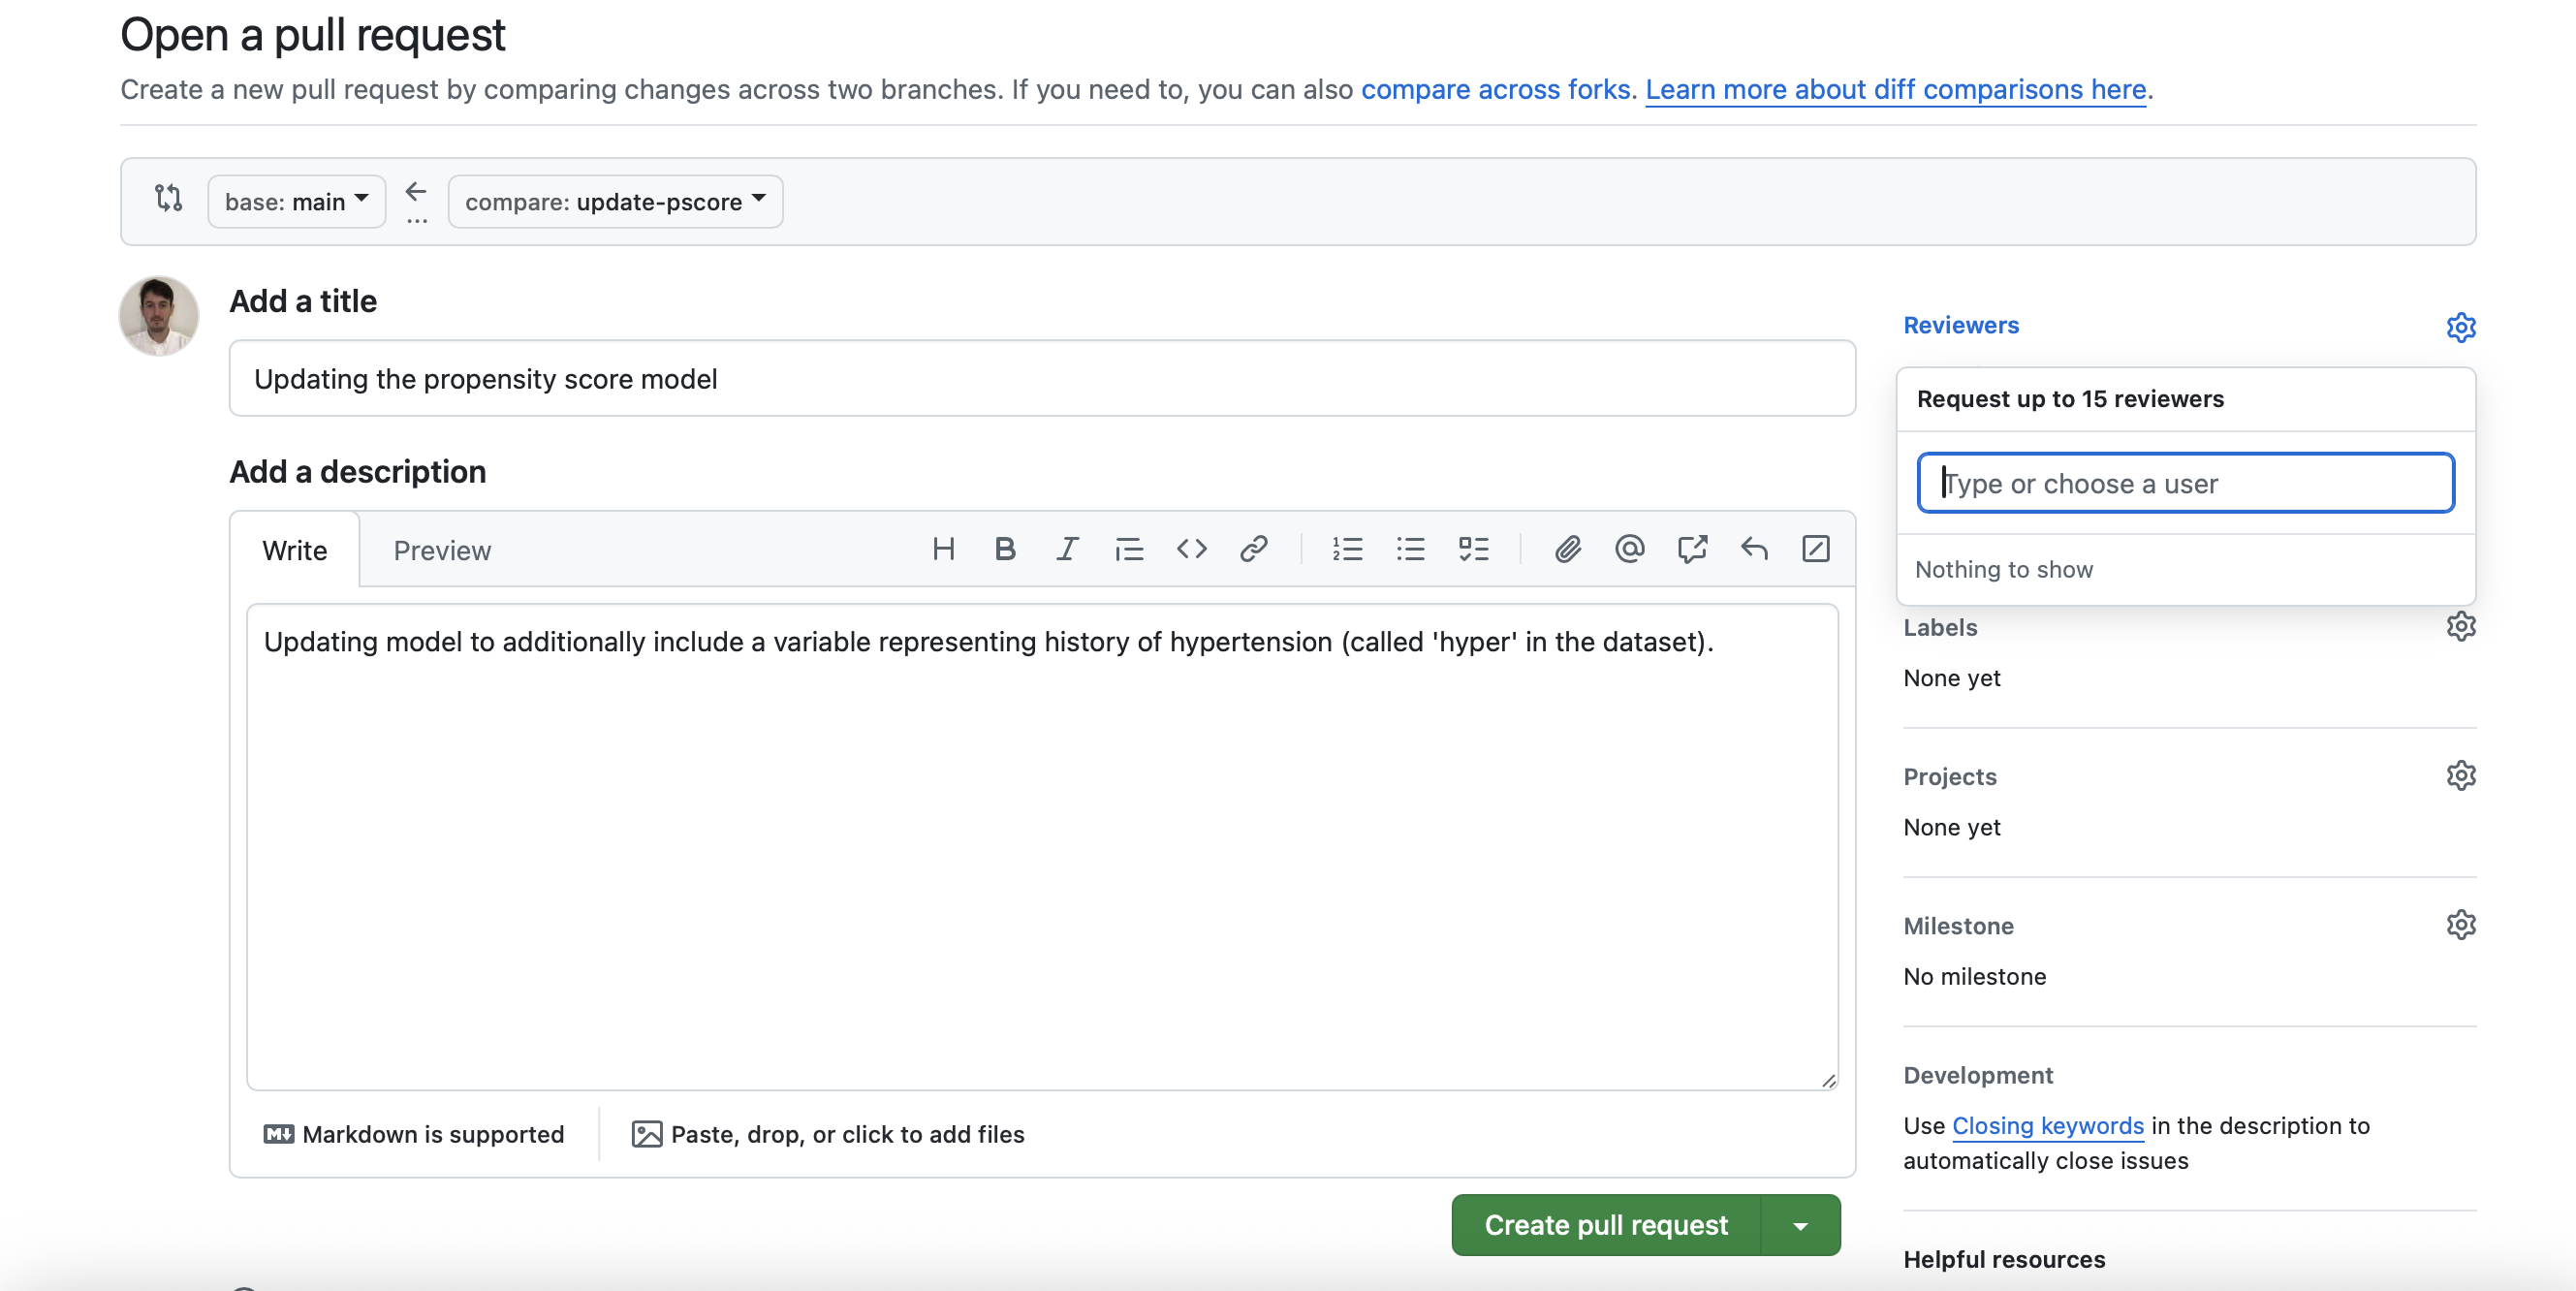 6. A note on ‘reviewers’. - On the right-hand side of the screenshot above, we can add ‘reviewers’ - members of the team we would like to review the changes before we merge them. To be a reviewer, a person must have a GitHub account and be a collaborator for the repository. Navigate to the ‘Settings’ tab and select ‘Collaborators’ under ‘Access’ heading on the left-hand side. Click ‘Add people’ and you’ll be prompted to enter the GitHub usernames for collaborators. Afterwards, they can be added as ‘reviewers’ and comment on the changes.
5.10.4 Merging a pull request
- Before merging, a reviewer would typically comment on the suitability of merging the proposed code. In this case, the changes are minimal and quick to check, therefore a comment as below may be added.
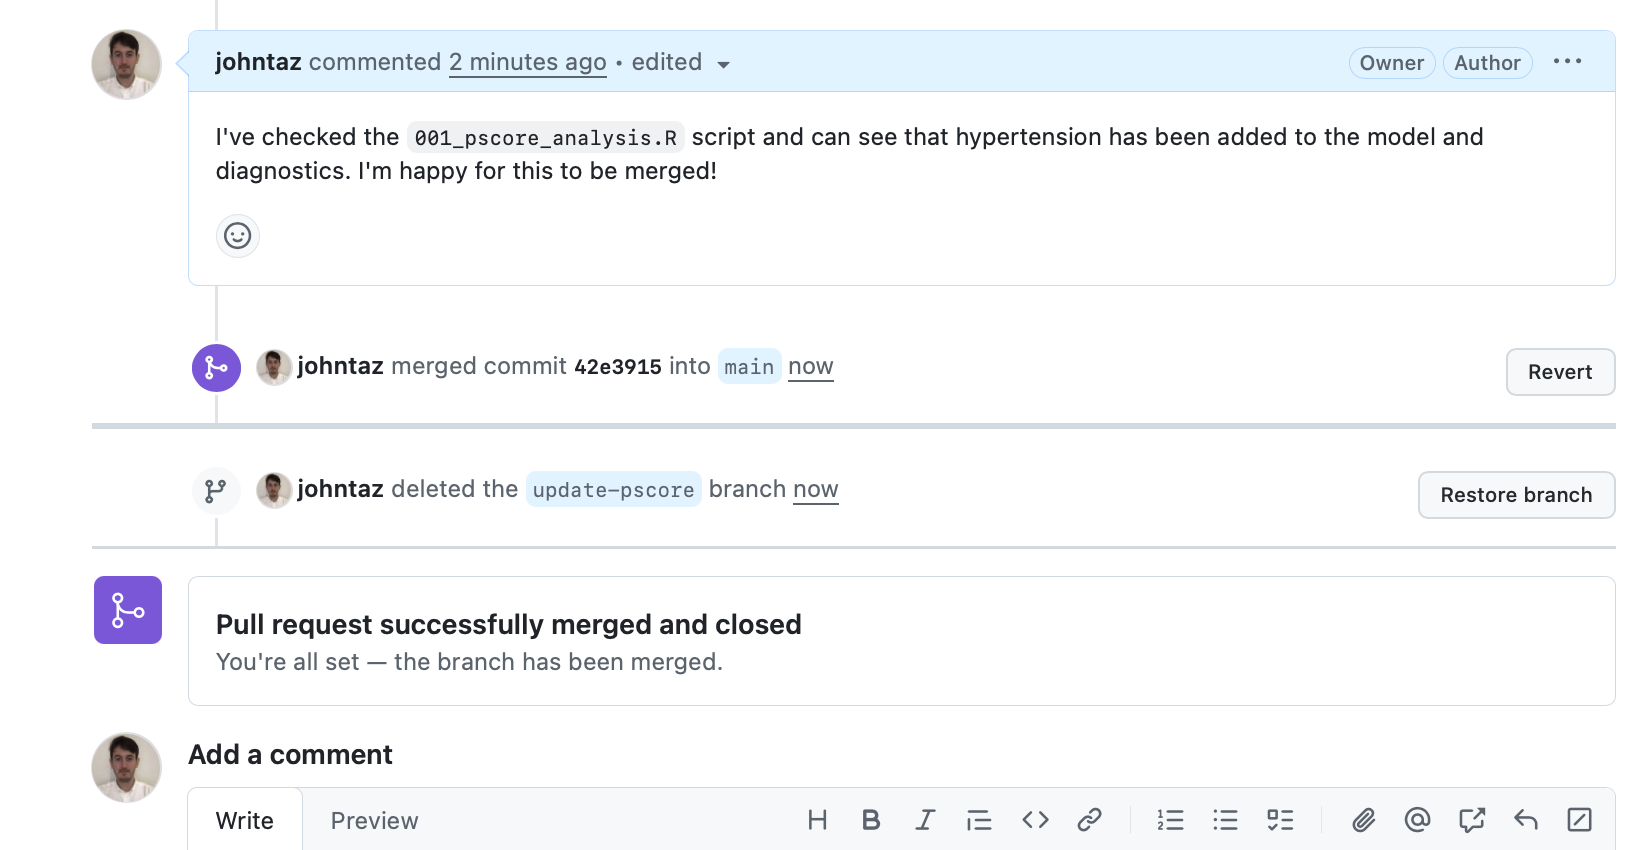
 2. Once we’re happy to merge these changes, we can click ‘Merge pull request’.
- We can see confirmation that this branch has been merged into main and can now safely delete the ‘update-pscore’ branch.
5.10.5 Checking merge
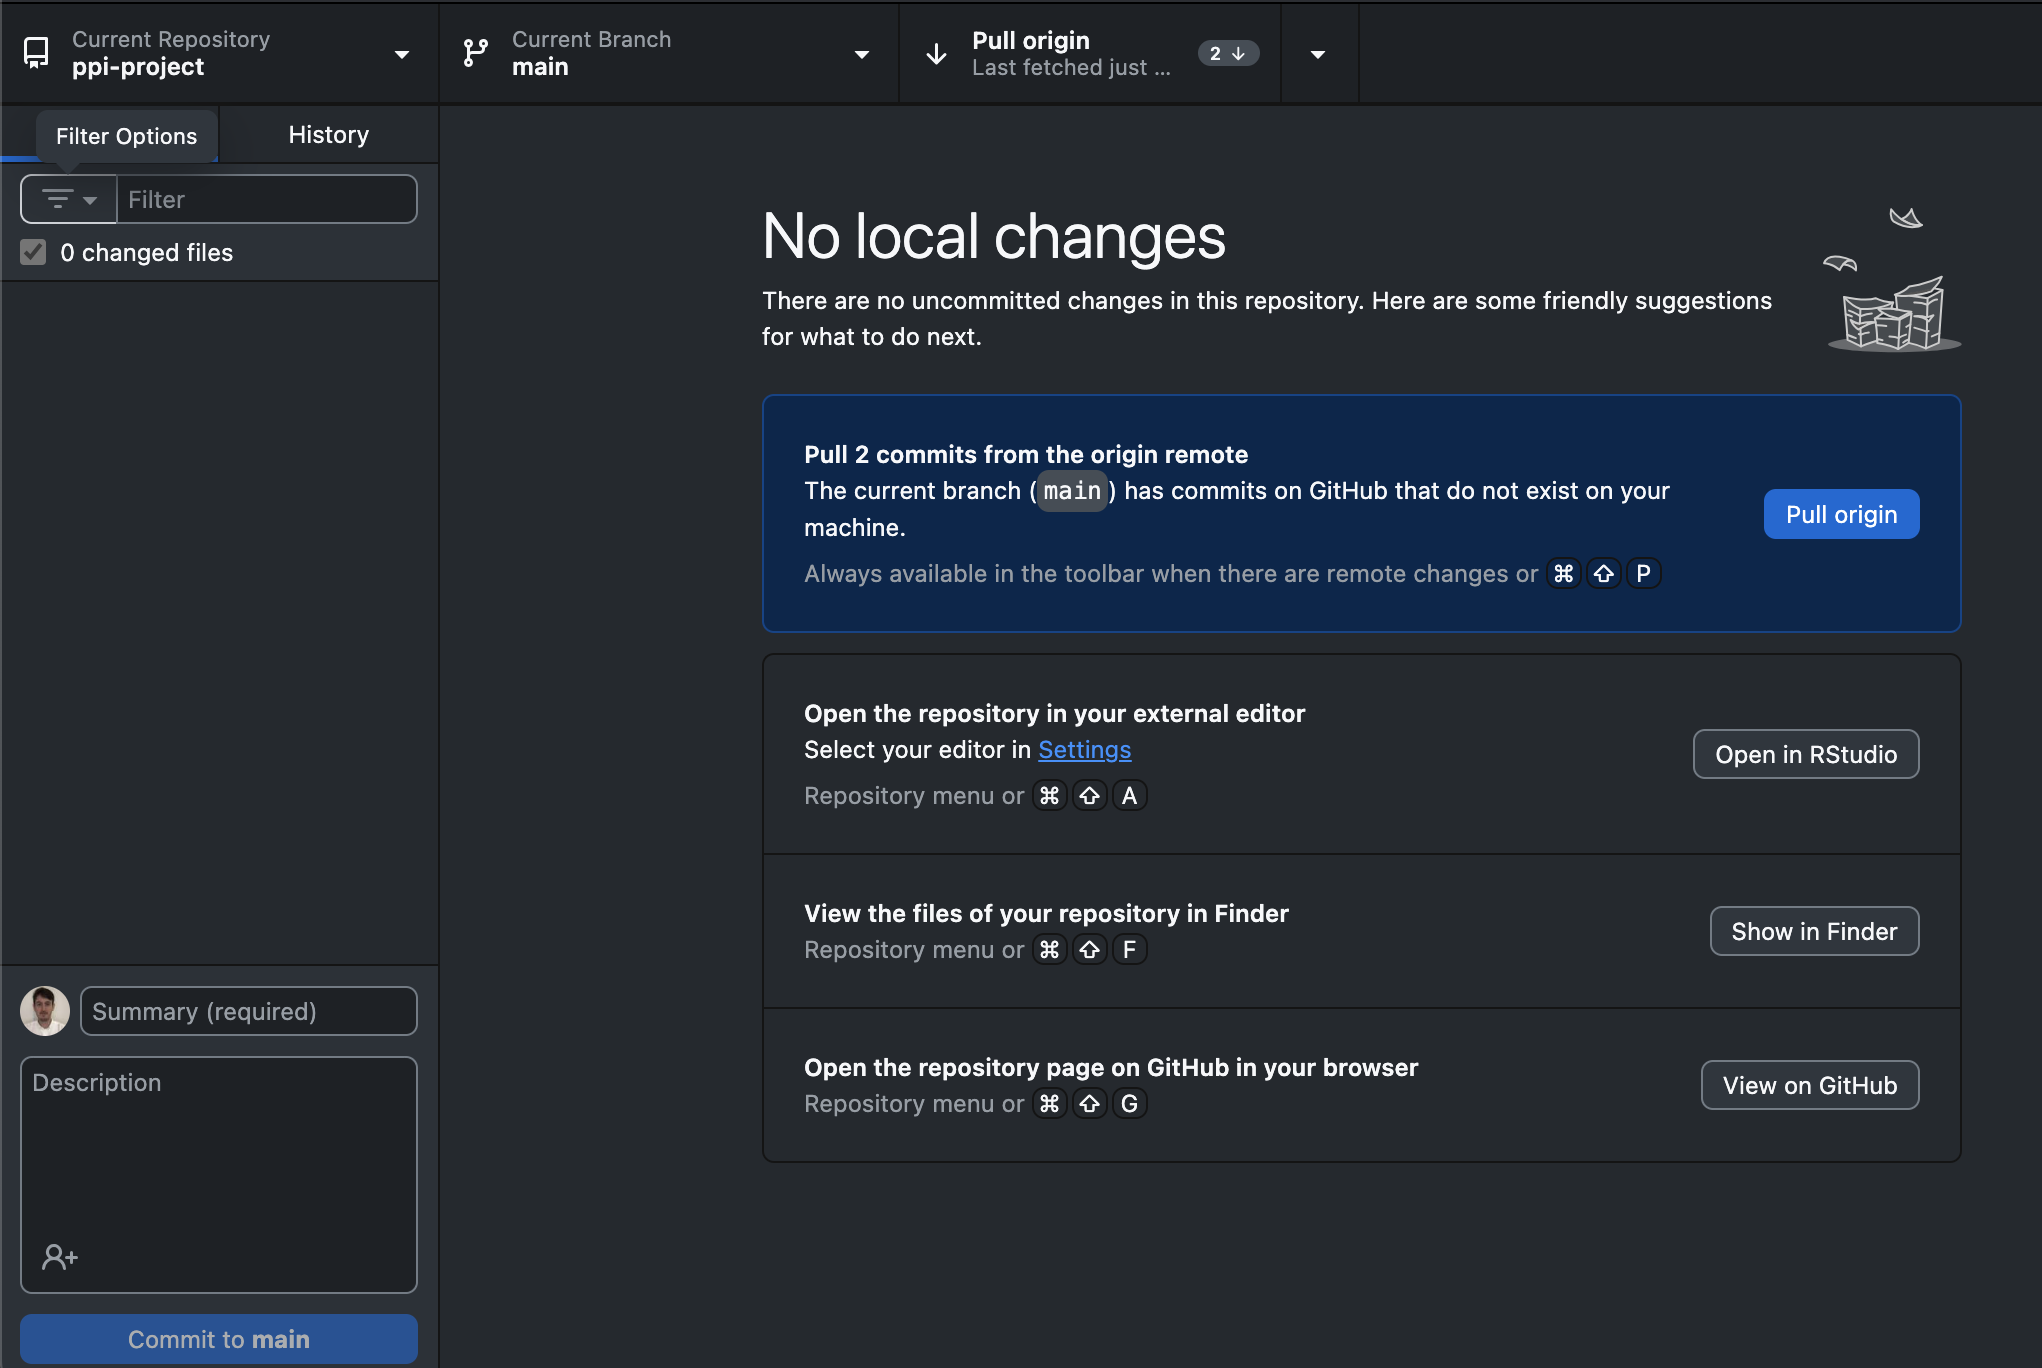
- Navigate back to GitHub Desktop. Change the ‘Current branch’ to ‘main’.
- You can now ‘Pull’ the changes from the branch we have merged to the main branch on your local computer. Click Pull origin in the top right-hand corner within the repository bar.
- Navigate to your local repository folder and see the updated file!
5.11 Additional Resources
Weberpals, J. & Wang, S. V. The FAIRification of research in real-world evidence: A practical introduction to reproducible analytic workflows using Git and R. Pharmacoepidemiol. Drug Saf. (2024)
Morton, C. et al. Software development skills for health data researchers. BMJ Health Care Inform. 29, e100488 (2022).
Bryan, J. Excuse Me, Do You Have a Moment to Talk about Version Control? PeerJ Preprints (2017)
Webpages:
- Comprehensive Documentation for Github Desktop
- Cheatsheet with common
Gitcommands: - Git manual by Atlassian (provider of the
Bitbucketplatform) - Coursera courses:
- Introduction to Git and GitHub (Google)
- Version Control with Git (Atlassian)
- Getting Started with Git and GitHub (IBM)